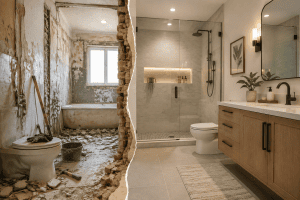
Replacing shower tile is one of those bathroom projects that can look straightforward until you start removing the first few tiles.
Then you may discover swollen drywall, darkened framing, loose mortar, soft areas around the curb, or water stains below the shower.
That raises an important question: Is the tile actually the problem, or is the shower pan leaking underneath it?
That distinction matters because new tile cannot fix a fatill end up with the same leak if water is getting through the waterproofing system, iled shower pan. You can replace every cracked tile in the shower and sdrain connection, curb, corners, or shower receptor.
Before spending money on new tile, adhesive, grout, and labor, it is worth testing the shower systematically.
Quick Answer: How Do You Check a Shower Pan for Leaks?
The most useful basic check is a controlled water test of the shower receptor while keeping the shower walls and plumbing connections out of the test as much as possible.
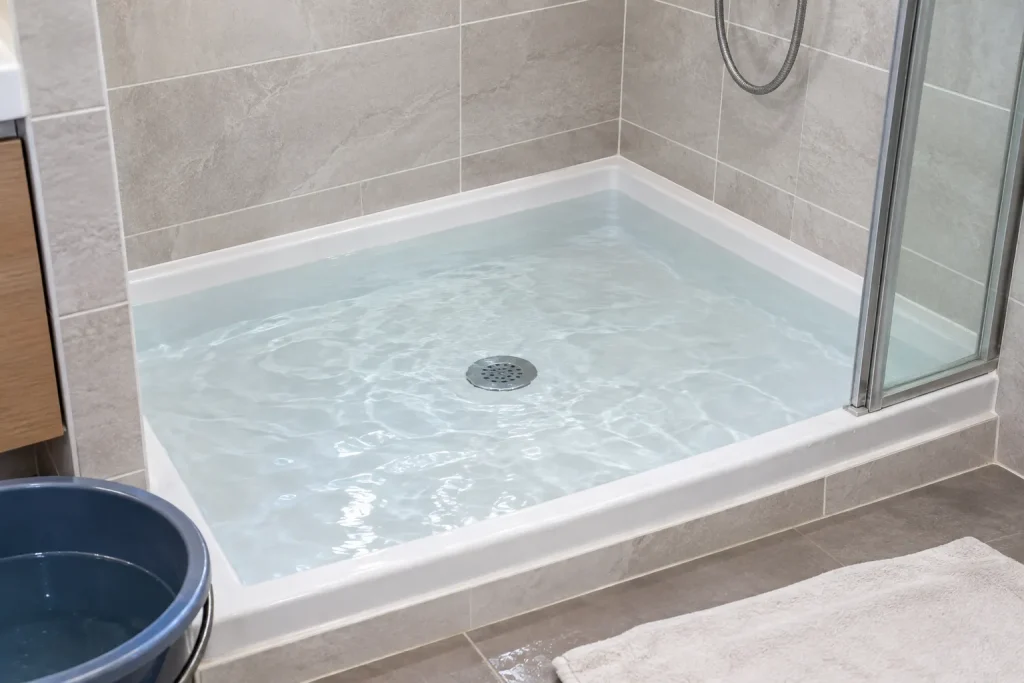
First inspect the visible areas around the drain, curb, corners, and lower walls. Then isolate the drain with an appropriate test plug, add water to the shower base, mark the water level, and monitor it for a suitable test period according to the waterproofing system and applicable local requirements.
A stable water level with no signs of leakage is a good indication that the receptor is holding water. A falling level, unexplained moisture outside the shower, or water appearing below the shower indicates that more investigation is needed.
Do not assume that a failed water test automatically means the entire shower pan must be replaced. The exact leak location still matters.
Why You Should Test the Shower Pan Before Replacing Tile
Tile is a finish layer. It is not the primary waterproofing system of a properly constructed modern shower.
Depending on the construction method, water management may rely on a traditional shower liner, a bonded sheet membrane, a liquid-applied waterproofing membrane, a preformed shower base, or another approved waterproofing assembly.
That means a shower can have beautiful-looking tile while still having a serious waterproofing problem underneath.
This is also why simply replacing cracked grout or applying a new surface sealer is not a reliable way to repair a leaking shower pan.
If the waterproofing layer has failed, the correct repair depends on where that failure occurred and how the shower was constructed.
For more expert resources, explore our Bathroom Waterproofing category, where we cover materials, repair methods, and prevention strategies in depth.
What Exactly Are You Testing?
Before testing, it helps to understand what people mean by “shower pan.”
In everyday conversation, homeowners often use the term to describe the entire shower floor assembly. Technically, the waterproofing arrangement can vary significantly.
| Shower Construction | Typical Waterproofing Location | What Can Fail |
|---|---|---|
| Traditional liner system | Below the mortar bed | Liner, seams, drain connection, corners, curb |
| Sheet membrane system | Directly below tile or under the tile substrate | Seams, corners, penetrations, drain connection |
| Liquid-applied membrane | Coated over the substrate | Thin areas, pinholes, cracks, transitions, penetrations |
| Factory-built shower base | Integrated receptor | Cracks, drain connection, joints, movement |
This distinction is important because the visible symptom may be similar even when the underlying failure is completely different.
Step 1: Inspect the Shower Before Adding Any Water
Start with a visual inspection.
You are looking for evidence that may tell you where water has been escaping.
- Cracked or missing grout near the shower floor.
- Cracked silicone at changes of plane.
- Loose or hollow-sounding lower wall tiles.
- Gaps around the drain assembly.
- Cracks at the curb.
- Damaged corners.
- Water staining outside the shower.
- Discoloration on the ceiling below.
- Soft drywall beside the shower.
- Swollen baseboards or trim.
Do not treat every one of these signs as proof of a failed shower pan.
For example, deteriorated silicone at a vertical corner may allow water behind the surface tile, while the actual shower pan remains watertight.
Likewise, a dark grout joint does not automatically mean the waterproofing layer has failed.
Step 2: Identify How the Shower Was Built
This is one of the most useful questions to ask before testing.
Do you know whether the shower uses a PVC or CPE liner, a bonded sheet membrane, a liquid waterproofing product, or a prefabricated receptor?
If you built the shower recently, check the installation documents, product packaging, photographs from construction, or contractor records.
If the shower is older, look for clues around the drain and curb.
A traditional mortar-bed shower usually has a different drain and waterproofing arrangement from a bonded membrane shower.
Do not randomly remove the drain assembly just to investigate. A drain can be damaged surprisingly easily, and the repair may create a new leak if it is reassembled incorrectly.
Step 3: Isolate the Shower Drain for a Controlled Test
A proper shower pan test requires the water to remain in the receptor rather than simply flowing down the drain.
For many shower systems, this means using an appropriate test plug or inflatable test plug in the drain assembly.
The exact location of the plug depends on the drain design and construction method, so follow the shower system manufacturer’s instructions.
The goal is simple: you want to test whether the waterproofed shower receptor can hold water.
Do not rely on stuffing a rag into the drain or using an improvised plug that could leak or become difficult to remove.
Step 4: Fill the Shower Pan with Water
Once the drain is properly isolated, add water to the shower floor.
Do not immediately fill the shower to the highest possible level.
Fill it only to a level appropriate for the shower assembly and test method, while keeping the water below any vulnerable wall penetrations or openings that are not supposed to be part of the pan test.
This is particularly important in a shower with a low curb, a curbless entry, or unusual drain geometry.
For a curbless shower, the test may require a temporary dam at the shower threshold so the receptor can hold water.
Manufacturers of bonded waterproofing systems commonly recommend waiting until the waterproofing assembly has adequately set before performing a flood or water test. Schluter, for example, recommends waiting at least 24 hours after its membrane installation is complete before water testing and notes that local plumbing codes may impose specific requirements.
Step 5: Mark the Initial Water Level
This is a simple step that makes the test much more useful.
Use a pencil, removable marker, or a small piece of tape on a nearby vertical surface to record the starting water level.
Take a photo as well.
Why?
Because your eyes are poor at detecting a small water-level change over several hours, especially in a shallow shower pan.
You want a reference point.
Also write down the time the test started.
A simple note such as “8:00 AM — water level at tape mark” is much more useful than trying to remember where the water was later.
Step 6: Check the Area Around and Below the Shower
While the test is running, inspect areas outside the shower.
Check:
- The ceiling directly below the shower.
- The wall on the opposite side of the shower.
- The floor immediately outside the shower.
- Baseboards and trim.
- Access panels if available.
- Visible plumbing or framing cavities.
If there is an existing water stain, measure or photograph it before the test begins.
This gives you a baseline and helps determine whether the condition changes during testing.
For a second-story bathroom, the ceiling below can be particularly useful because even a relatively small shower-pan leak may eventually show up there.
How Long Should a Shower Pan Water Test Last?
There is no single universal test duration that should replace the manufacturer’s instructions and local code.
For many bonded waterproofing systems, 24 hours is a commonly recommended test period. Schluter specifically describes 24 hours as typical for its shower-system water tests after the membrane has had adequate time to set.
Some jurisdictions or specific shower systems may have different testing requirements.
That is why the safest approach is to verify the requirements for the actual waterproofing system instead of treating 24 hours as a universal code rule for every shower in every location.
What Counts as a Failed Test?
A shower pan test should not be judged solely by whether the water level appears perfectly unchanged.
Look for multiple signs.
| Test Result | Possible Meaning | What to Do |
|---|---|---|
| Water level appears stable | Receptor is holding water | Investigate other leak sources if symptoms remain |
| Water level drops noticeably | Possible leak or testing issue | Check plug, drain, pan, and surrounding areas |
| Moisture appears below shower | Possible waterproofing or plumbing leak | Investigate before installing new tile |
| Water escapes near curb | Possible curb or membrane transition failure | Inspect construction and waterproofing details |
| Water appears around drain | Possible drain connection problem | Inspect drain assembly before replacing tile |
Remember that evaporation can also affect the water level, especially in a warm, dry bathroom.
That is one reason a controlled test should include a known reference, and why a very small level change should not automatically be interpreted as a failed shower pan.
Before Blaming the Shower Pan, Rule Out the Drain Test Plug
This is a real-world detail that can save you from tearing apart a perfectly good shower.
If the water level drops during the test, confirm that the test plug itself is sealing correctly.
A leaking plug can imitate a leaking shower pan.
Schluter’s water-test procedure specifically includes checking the test plug before filling the shower assembly.
If you skip that step, you may falsely conclude that the waterproofing has failed.
Do Not Confuse a Shower Pan Leak with a Shower Plumbing Leak
This is another common diagnostic mistake.
A shower can leak even when the pan itself is completely watertight.
For example, water may escape from:
- The shower valve connection.
- The shower arm connection.
- A pipe fitting inside the wall.
- A handheld shower connection.
- A poorly sealed pipe penetration.
- A damaged drain connection.
That is why a pan test and a plumbing test are not necessarily the same test.
If water appears only while the shower is operating and not while the pan is holding test water, investigate the supply plumbing, showerhead, valve, wall penetrations, or splash patterns.
A Simple Way to Separate Pan Problems from Wall Problems
Suppose the shower leaks onto the ceiling below only when someone actually takes a shower.
Do not immediately assume the pan is the culprit.
A practical diagnostic approach is to isolate the variables.
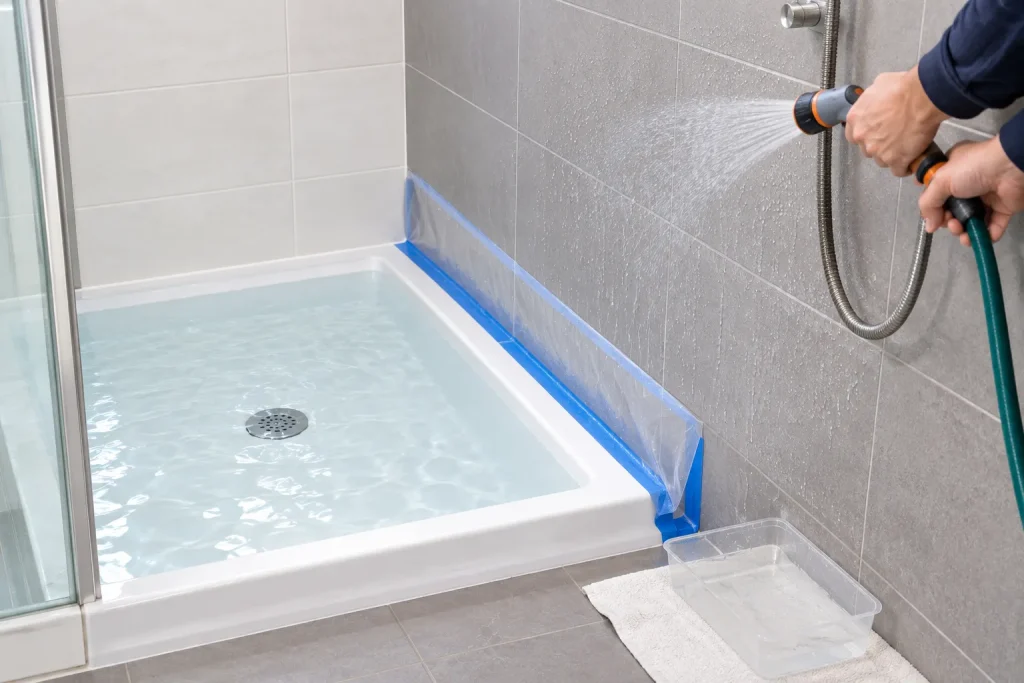
First test the receptor without spraying the walls.
Then, if appropriate and safe, test the shower walls and plumbing separately.
If the shower pan holds water but a leak appears when the walls are sprayed, the problem may be higher in the waterproofing assembly, around a penetration, at the curb, or in the shower plumbing.
This distinction can save an enormous amount of unnecessary demolition.
What If the Shower Pan Passes but the Tile Is Damaged?
This is actually good news.
If the waterproofing system passes an appropriate water test and the leak symptoms disappear once failed surface details are repaired, you may not need to rebuild the entire shower floor.
Loose tiles, cracked grout, damaged silicone joints, or localized surface failures can sometimes be repaired without replacing the complete shower pan.
However, do not interpret a successful flood test as proof that every part of the shower is perfect.
The test primarily tells you whether the tested receptor can retain water under the test conditions.
It does not automatically verify every wall seam, penetration, transition, or plumbing connection.
When a Shower Pan Failure Usually Means Bigger Repairs
If the receptor cannot hold water after the test plug has been verified, you should stop and diagnose the construction before installing new tile.
Depending on the shower design, possible causes include:
- Damaged shower liner.
- Failed liner seam.
- Improper drain connection.
- Damaged waterproof membrane.
- Membrane penetration.
- Failed curb waterproofing.
- Cracked or damaged prefabricated pan.
- Movement that has opened a waterproofing joint.
The repair method depends heavily on which system was installed.
For example, a damaged traditional liner and a damaged bonded sheet membrane are not repaired in exactly the same way.
This is why identifying the waterproofing system before demolition is so valuable.
Should You Replace the Tile If the Shower Pan Fails?
In many cases, yes.
The reason is practical rather than aesthetic.
The waterproofing layer is usually hidden beneath the tile. Once the shower pan has to be repaired or replaced, access to the waterproofing assembly generally requires removing at least part of the tile and substrate.
If the shower is already old and multiple waterproofing components are questionable, a full rebuild may provide a better long-term result than attempting a series of small repairs.
But a pan failure does not automatically mean every tile on every wall must be removed.
The scope depends on the construction method and the location of the failed waterproofing.
Cost: Test First or Replace Everything?
A basic leak investigation is usually far cheaper than unnecessary demolition.
| Approach | Relative Cost | Disruption | Best Use |
|---|---|---|---|
| Visual inspection | Low | Very low | First diagnostic step |
| Controlled pan water test | Low | Low | Checking receptor integrity |
| Plumbing leak investigation | Low to medium | Low to medium | Leaks occurring only during shower use |
| Localized tile repair | Medium | Medium | Surface-level damage |
| Partial shower rebuild | High | High | Localized waterproofing failure |
| Complete shower rebuild | Very high | Very high | Widespread waterproofing or structural problems |
Actual costs vary substantially by location, labor rates, tile type, demolition requirements, waterproofing system, and whether the underlying framing has also been damaged.
The point is not that testing guarantees a cheap repair. The point is that a relatively inexpensive diagnostic step can prevent you from spending money on tile replacement before you understand the real problem.
Real-World Scenario: The Shower Looks Bad but Does Not Leak
Imagine a 10-year-old shower with cracked grout, a few loose floor tiles, and darkened corners.
The homeowner assumes the shower pan is failing and plans to replace the entire shower.
A water test shows the receptor holds water without a noticeable loss, and there are no new moisture signs below.
Further inspection finds that the main problem is deteriorated grout and failed sealant at several changes of plane.
That does not mean the shower is perfect, but it changes the repair strategy considerably.
Instead of immediately demolishing the entire shower, the homeowner can investigate the surface and transition failures first.
Real-World Scenario: The Shower Pan Holds Water, but the Ceiling Still Gets Wet
Now consider the opposite situation.
The shower pan passes the test, but the ceiling below becomes damp whenever someone takes a long shower.
This strongly suggests that the source may be elsewhere.
Possible suspects include the shower valve, a pipe connection, a wall penetration, failed waterproofing above the tested water line, or water escaping from the shower enclosure.
In that situation, replacing the shower floor tile would be a poor first move.
Real-World Scenario: Water Appears at the Curb
The curb deserves special attention because it contains several transitions in a small area.
A waterproofing system has to connect the shower floor to the curb and then transition to the vertical surfaces.
If the curb was waterproofed poorly, water can escape while the main floor area appears to perform normally.
If the leak is concentrated at the curb, inspect that transition rather than assuming the entire shower pan has failed.
What Not to Do Before Replacing Shower Tile
- Do not assume cracked grout equals a failed pan.
- Do not assume a dry ceiling means the waterproofing is perfect.
- Do not use an improvised drain plug that you cannot verify.
- Do not remove the drain assembly unnecessarily.
- Do not start demolition before identifying the waterproofing system.
- Do not rely on surface waterproofing paint as a substitute for repairing a failed underlying waterproofing system.
- Do not install new tile before confirming that the water-management system is sound.
When Should You Call a Professional?
A professional inspection is especially worthwhile when the test indicates a leak but the source is not obvious.
It is also a good idea when the shower is over a finished room, the framing appears damaged, the waterproofing method is unknown, or the bathroom has already experienced repeated leaks.
If there is visible structural damage, mold-like growth, electrical equipment affected by water, or significant water intrusion, stop using the shower until the cause has been evaluated.
For complex showers with multiple body sprays, steam equipment, concealed valves, curbless transitions, benches, niches, or unusual drainage, professional diagnosis can be much more efficient than trial-and-error demolition.
Frequently Asked Questions
Can I test a shower pan without removing the tile?
Yes. In many shower assemblies, a water test can be performed with the tile still installed because the purpose is to evaluate the water-retention capability of the receptor or waterproofing assembly. The exact method depends on the shower construction and drain system.
How long should I leave water in a shower pan to test for leaks?
Twenty-four hours is a commonly used test period for many bonded shower waterproofing systems, but you should follow the specific manufacturer’s instructions and local requirements. Schluter, for example, describes 24 hours as typical for its water-test procedure after adequate membrane curing or setting time.
What if the water level drops a little during the test?
First verify the test plug, starting water level, and test conditions. Evaporation can cause small changes, especially in warm or dry rooms. A noticeable unexplained drop, particularly when accompanied by moisture outside the shower, deserves further investigation.
Can new grout fix a leaking shower pan?
No. New grout may improve a damaged tile surface, but it should not be considered a repair for a failed shower pan or waterproofing system. The waterproofing layer beneath the tile has to be addressed when that is the source of the leak.
Should I replace the entire shower if the pan fails?
Not necessarily. The correct scope depends on the waterproofing system and where the failure occurred. Some failures can be repaired locally, while widespread or inaccessible waterproofing problems may make a larger rebuild more practical.
Conclusion
Before you spend money replacing shower tile, find out whether the shower pan is actually leaking.
Start with a visual inspection. Identify the waterproofing system. Use the correct drain test plug. Perform a controlled water test, mark the starting level, and inspect the surrounding and lower areas for moisture.
Most importantly, separate the possible causes.
A cracked tile is not the same problem as a failed waterproofing membrane. A leaking shower valve is not the same problem as a leaking pan. And a failed curb transition does not automatically mean the entire shower floor is beyond repair.
Testing first gives you something much more valuable than a quick answer: it gives you evidence before demolition begins.
That can mean a smaller repair, a better renovation plan, and a much lower chance of installing beautiful new tile over a problem that was never fixed.