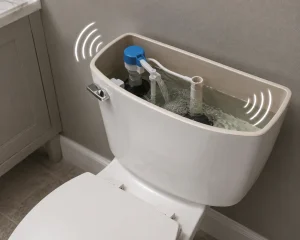
A leaking toilet shutoff valve does not always mean you need to remove the toilet. In many American homes, especially those with a standard compression-style angle stop, you can replace the valve with the toilet still sitting securely in place.
The job is usually straightforward when the shutoff valve is visible, the water supply can be completely turned off, and there is enough room to work behind or beside the toilet. The difficult part is not installing the new valve—it is identifying the existing connection and avoiding damage to the water pipe inside the wall.
In this guide, I’ll show you how to replace a toilet shutoff valve without removing the toilet, what tools you need, how to handle a compression fitting, how to check for leaks afterward, and when this repair is better left to a professional plumber.
Quick Answer
Yes, you can usually replace a toilet shutoff valve without removing the toilet.
If the existing valve is accessible and uses a compression, threaded, or compatible push-to-connect connection, the toilet can normally remain installed. You only need to shut off the water, drain the supply line, disconnect the old valve, install the replacement, reconnect the toilet supply line, and test everything carefully.
However, you may need professional help if the valve is soldered to copper pipe, the supply pipe is badly corroded, the main water shutoff does not work, or the connection cannot be safely accessed without moving the toilet.
When You Can Replace the Toilet Shutoff Valve Without Removing the Toilet
Before touching a wrench, look at the valve behind the toilet and determine how it connects to the home’s water supply.
You are generally in a good position for a no-toilet-removal repair when:
- The shutoff valve is completely visible.
- You can reach the valve with a wrench.
- The local shutoff valve or main water supply can stop the water completely.
- The pipe coming from the wall or floor is in reasonably good condition.
- There is enough clearance to loosen and tighten the connections.
- The valve does not require cutting into the wall or floor.
If these conditions are present, removing the toilet usually adds unnecessary work to a valve replacement.
Practical experience: I always inspect the connection before deciding whether a toilet needs to come out. A toilet can make the work area look cramped, but that does not necessarily mean the toilet itself is blocking the repair.
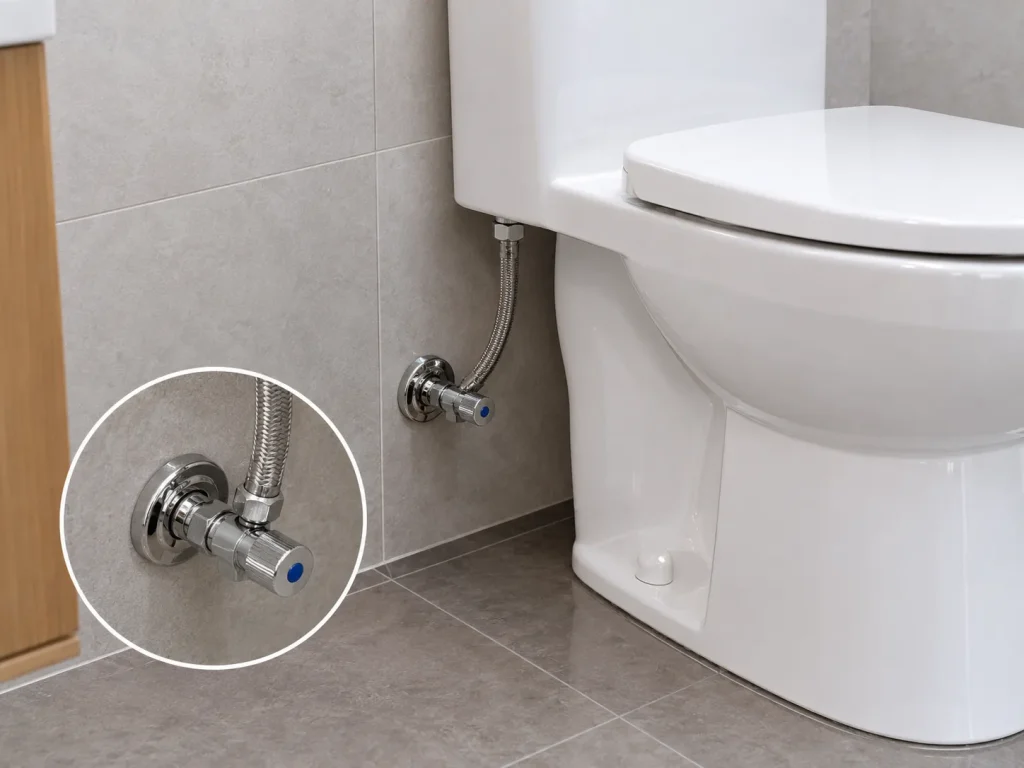
Toilet Shutoff Valve Types You May Find
Not every toilet shutoff valve is installed the same way. Identifying the connection type before buying a replacement can save you from taking the water supply apart twice.
| Valve Connection | What It Looks Like | DIY Difficulty | Toilet Removal Usually Needed? |
|---|---|---|---|
| Compression | Compression nut and ferrule around the supply pipe | Low to moderate | No |
| Threaded | Valve screws onto a threaded fitting | Moderate | No, if accessible |
| Push-to-connect | Valve pushes directly onto compatible pipe | Low to moderate | No |
| Soldered | Valve permanently soldered to copper pipe | Moderate to high | Usually no, but specialized tools may be required |
Important: Do not buy a replacement valve based only on its appearance. The inlet connection, outlet connection, pipe material, and available space all need to match your installation.
Tools and Materials You Need
For a typical compression-style toilet shutoff valve replacement, you may need:
- Adjustable wrench
- Second wrench for holding the valve or fitting
- Bucket or shallow container
- Old towel or rag
- Replacement toilet shutoff valve
- New toilet supply line if the existing line is worn
- Flashlight
- Dry paper towels for leak testing
- Compression-ring removal tool if the old ferrule is stuck
A new braided toilet supply line is worth considering if the existing line is old, kinked, corroded, or has damaged fittings. Replacing a questionable supply line at the same time is easier than discovering a second leak a few days later.
Step 1: Shut Off the Toilet’s Water Supply
If the existing toilet shutoff valve still works, turn the handle clockwise until the water stops.
Flush the toilet and watch the tank. If the tank does not refill after flushing, the local shutoff valve is probably stopping the supply.
If the valve does not completely stop the water, do not continue with the repair. Shut off the home’s main water supply instead.
Place a bucket underneath the valve and cover the surrounding floor with a towel. Even after the water is shut off, the supply line will contain residual water.
Real-world tip: Never skip the bucket simply because you think the line is empty. A small amount of trapped water can still make a mess when you loosen the supply connection.
Step 2: Disconnect the Toilet Supply Line
Locate the braided or flexible supply line running from the shutoff valve to the bottom of the toilet tank.
Loosen the connection at the shutoff valve using an adjustable wrench. Once the nut is loose, finish removing it by hand and allow the remaining water to drain into the bucket.
Inspect the supply line before deciding whether to reuse it.
- Look for damaged or frayed braided material.
- Check for corrosion around the fittings.
- Look for kinks or sharp bends.
- Inspect the rubber sealing washer.
If the line shows obvious deterioration, replace it instead of reinstalling a questionable component.
Step 3: Remove the Old Toilet Shutoff Valve
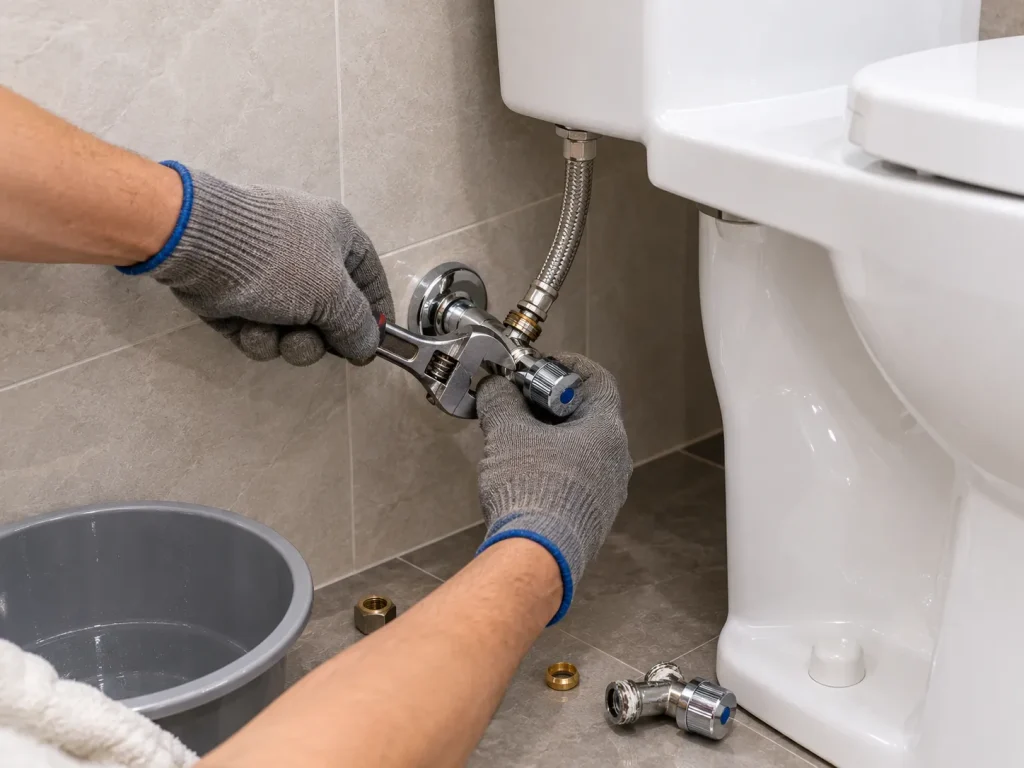
If you have a compression-style angle stop, locate the large compression nut where the valve connects to the supply pipe.
Use one wrench to stabilize the valve body and another to loosen the compression nut.
This is one of the most important parts of the job: do not allow the pipe coming from the wall to twist.
The visible valve is replaceable. The supply pipe inside the wall is a much bigger problem if it becomes damaged or disconnected.
Once the compression nut is loose, slide the old valve away from the pipe.
The old compression ferrule may remain on the pipe. If it is damaged, heavily corroded, or incompatible with the replacement valve, remove it carefully rather than forcing the new valve over it.
Step 4: Inspect the Water Supply Pipe
Before installing the new shutoff valve, inspect the exposed pipe.
Check that:
- The pipe is reasonably round.
- The sealing area is smooth.
- There is no severe corrosion or pitting.
- The pipe is firmly supported.
- There is enough exposed pipe for the new connection.
This inspection matters because a new valve cannot compensate for a severely damaged pipe surface.
If the pipe is badly corroded or damaged, stop and determine whether the damaged section needs to be repaired or replaced first.
Step 5: Install the New Shutoff Valve
For a compression connection, install the appropriate compression nut and ferrule onto the supply pipe according to the valve manufacturer’s instructions.
Push the new shutoff valve onto the pipe and thread the compression nut onto the valve by hand.
Make sure the valve is properly aligned before tightening.
Hold the valve body with one wrench while tightening the compression nut with the other.
Do not overtighten the connection. A compression fitting is designed to seal by compressing the ferrule against the pipe. Excessive force can damage the fitting or deform the components.
If the new valve uses a threaded or push-to-connect connection instead, follow the installation requirements for that specific valve and pipe material.
Step 6: Reconnect the Toilet Water Supply Line
Reconnect the toilet supply line to the outlet of the new shutoff valve.
Start the connection by hand to reduce the risk of cross-threading.
Once the connection is hand-tight, use a wrench for the final tightening required by the fitting.
Keep the supply line naturally aligned between the valve and toilet tank. Avoid forcing the line sideways or creating a sharp bend.
If the supply line is damaged or has a deteriorated sealing washer, install a new line instead.
Step 7: Turn the Water Back On Slowly
Do not immediately open the new valve all the way.
Open the water supply slowly while watching the new connections.
Check the following areas:
- Supply pipe to shutoff valve connection
- Shutoff valve body
- Valve outlet
- Supply line connection
- Supply line to toilet tank connection
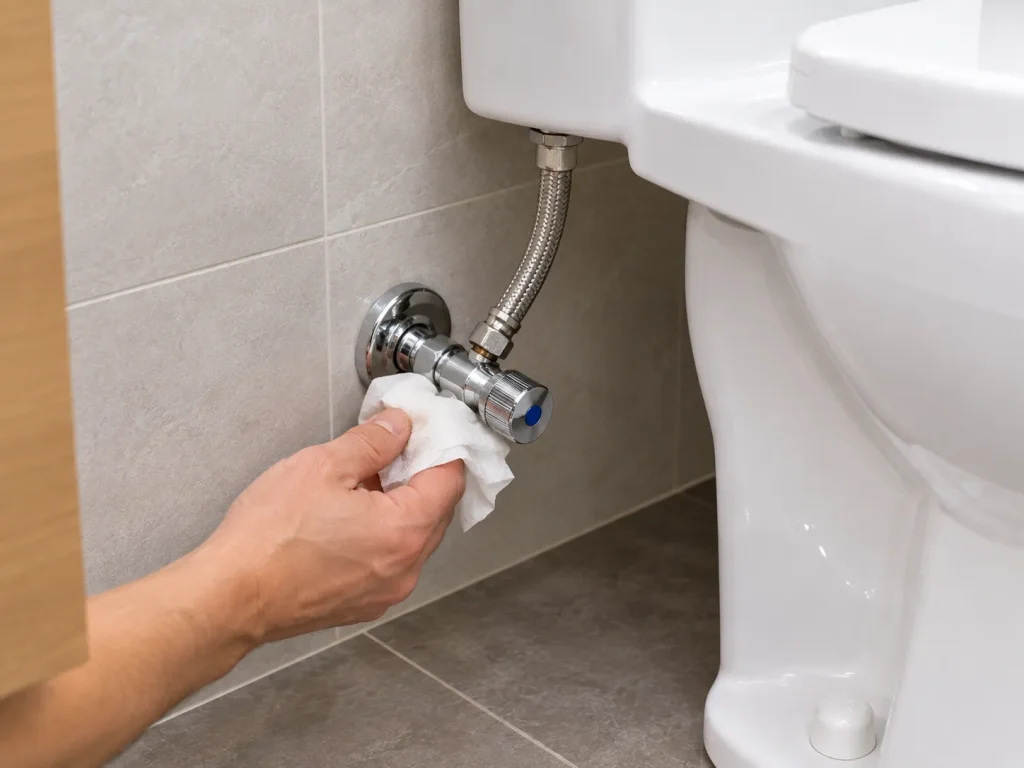
Use a dry paper towel around each connection. If the towel becomes damp, you have identified a leak that needs to be corrected.
Once everything remains dry, allow the toilet tank to fill completely.
Flush the toilet several times and inspect the valve and supply line again.
My preferred leak-check routine: check immediately after installation, check again after the tank fills, and check once more after several flushes. This takes only a few minutes and gives you much more confidence in the repair.
How Long Does Toilet Shutoff Valve Replacement Take?
A straightforward accessible compression valve can often be replaced in about 30 to 60 minutes by a homeowner who already has the necessary tools.
| Repair Situation | Approximate Time | Difficulty |
|---|---|---|
| Accessible compression valve | 30–60 minutes | Low to moderate |
| Stuck compression ferrule | 45–90 minutes | Moderate |
| Threaded valve | 30–90 minutes | Moderate |
| Soldered copper valve | 1–2+ hours | Moderate to high |
| Damaged or inaccessible pipe | Highly variable | High |
These are practical estimates, not guaranteed installation times. A clean, accessible connection may take less than an hour, while an old corroded valve can turn into a much larger repair.
Should You Replace the Toilet Supply Line Too?
If the existing supply line is in excellent condition, replacement is not necessarily required.
However, I would seriously consider replacing it if it has visible corrosion, damaged braiding, a kink, worn fittings, or an old sealing washer.
| Supply Line Condition | Recommended Action |
|---|---|
| Clean and undamaged | Reuse if compatible |
| Minor age but no visible damage | Replacement is optional |
| Corroded fittings | Replace |
| Damaged braided covering | Replace |
| Kinked or stressed line | Replace |
| Damaged sealing washer | Replace line or appropriate sealing component |
Quarter-Turn vs. Multi-Turn Toilet Shutoff Valves
If your old valve needs replacement anyway, this is a good opportunity to consider whether a quarter-turn model is appropriate for your installation.
| Feature | Multi-Turn Valve | Quarter-Turn Valve |
|---|---|---|
| Operation | Several turns | Approximately one-quarter turn |
| Emergency shutoff | Slower | Fast |
| Ease of operation | Can become stiff with age | Simple lever operation |
| Replacement consideration | Useful when compatible | Often a practical upgrade |
For a frequently used bathroom or a toilet where quick water shutoff matters, a quality quarter-turn angle stop can be a practical choice when it matches the existing plumbing connection.
Common Problems After Replacing a Toilet Shutoff Valve
Why is the new shutoff valve leaking?
Check the connection type, pipe condition, ferrule, alignment, and tightening. A leaking compression connection should not simply be tightened repeatedly. If the components are damaged or incorrectly installed, more force will not necessarily solve the problem.
Why does the supply pipe move when I loosen the valve?
This can indicate that the pipe is not adequately supported or that the fitting is transferring torque into the plumbing behind the wall. Stop before applying more force. Twisting the pipe can cause a much larger plumbing problem.
What if the old compression ferrule will not come off?
Do not aggressively pry against the pipe. A compression-ring removal tool is usually the cleaner option. If a cutting method is required, extreme care is necessary to avoid damaging the underlying pipe.
Can I replace a soldered toilet shutoff valve without removing the toilet?
The toilet itself may not need to be removed, but the valve may require cutting or desoldering the copper connection. If you are not experienced with soldering copper plumbing, this is a good point to stop and use a professional plumber.
How do I know whether I need to remove the toilet?
You generally do not need to remove it if the valve and connection are accessible from the side or rear and you can safely operate your tools. Toilet removal becomes more reasonable when the valve is physically blocked, the connection is hidden, or the plumbing cannot be accessed safely with the toilet installed.
When You Should Call a Plumber
A toilet shutoff valve replacement is a manageable DIY project when the plumbing is accessible and in good condition. But knowing when to stop is just as important as knowing how to install the valve.
Consider professional help if:
- The home’s main water supply cannot be completely shut off.
- The supply pipe twists when you loosen the valve.
- The copper pipe has severe corrosion or pitting.
- The valve is soldered and you do not have copper-soldering experience.
- The pipe disappears into the wall and appears damaged.
- You discover water leaking from inside the wall.
- The valve cannot be reached safely without moving the toilet.
- You are unsure which replacement valve matches the existing connection.
A $15–$30 component is not worth turning into a much larger plumbing repair because of excessive force or an incorrect connection.
Best Approach for Different Bathroom Situations
| Your Situation | Best Approach |
|---|---|
| Accessible compression valve with good pipe | Replace the valve without removing the toilet |
| Old stiff multi-turn valve | Consider a compatible quarter-turn replacement |
| Damaged supply line | Replace the supply line at the same time |
| Severely corroded pipe | Repair the pipe before installing the new valve |
| Soldered valve | Use professional help if you lack soldering experience |
| Valve blocked by toilet | Determine whether moving the toilet is safer than forcing tools into the space |
Final Toilet Shutoff Valve Checklist
- Identify the existing valve connection before buying a replacement.
- Confirm that the water can be completely shut off.
- Keep a bucket and towel underneath the connection.
- Release water pressure before disconnecting the supply line.
- Use two wrenches when necessary to prevent pipe movement.
- Inspect the exposed pipe for corrosion and damage.
- Use the correct nut and ferrule for the replacement valve.
- Do not overtighten compression fittings.
- Replace a visibly damaged toilet supply line.
- Open the water supply slowly.
- Check every connection with a dry paper towel.
- Flush the toilet several times and inspect again.
Conclusion
In many residential bathrooms, replacing a toilet shutoff valve does not require removing the toilet. If the valve is accessible, the water can be shut off completely, and the existing supply pipe is in good condition, a compression-style angle stop can often be replaced with the toilet left exactly where it is.
The most important part of the repair is not simply installing the new valve. It is identifying the correct connection, protecting the supply pipe, avoiding excessive tightening, and carefully testing the completed installation.
If the plumbing is severely corroded, the valve is soldered, the main water supply cannot be shut off, or the connection is inaccessible, stop rather than forcing the repair.
For related toilet plumbing problems, Toilet Repair guides can help you troubleshoot leaks, running toilets, weak flushing, clogs, and other common toilet problems.
For a clean, accessible compression connection, however, replacing the toilet shutoff valve without removing the toilet is often one of the simplest plumbing repairs you can make in a bathroom.