If you have already replaced the flapper and your toilet is still running, it can be frustrating. You replaced the part that is supposed to stop the leak, so why is water still flowing?
The answer is that the flapper is only one part of the toilet’s flushing system. A toilet can continue running because of an incorrect water level, a poorly fitted replacement flapper, a damaged flush valve seat, a faulty fill valve, a chain that is too tight, or water flowing into the overflow tube.
In my experience with residential bathroom repairs, the biggest mistake is assuming that a new flapper automatically rules out every problem inside the tank. A better approach is to watch exactly where the water is going before replacing another part.
Quick answer: If your toilet still runs after a new flapper is installed, check the flapper fit first, then inspect the flush valve seat, chain, water level, and fill valve. If water is visibly flowing into the overflow tube, the problem is usually related to the fill valve or float adjustment rather than the flapper.
In this article, you will learn: how to identify the real cause, how to test each component, which repair makes sense for your situation, and when replacing the entire flush mechanism is more practical.
Why Is My Toilet Still Running After Replacing the Flapper?
A new flapper eliminates one common cause of toilet leaks, but it does not eliminate every possible source of water loss.
The most likely causes are:
- The replacement flapper does not fit correctly.
- The flapper chain is too tight or too loose.
- The flush valve seat is damaged or covered with mineral deposits.
- The tank water level is too high.
- The fill valve is not shutting off properly.
- The float is incorrectly adjusted.
- The flush valve assembly itself is worn or damaged.
This is why replacing the flapper without checking the rest of the tank can sometimes leave the original problem unchanged.
Quick Diagnostic: Where Is the Water Going?
Before taking anything apart, remove the tank lid and watch the toilet for a few minutes after a normal flush. You are looking for one important clue: where the water continues to move after the tank should have finished filling.
| What You See | Most Likely Cause | First Repair to Check |
|---|---|---|
| Water flows continuously into the overflow tube | Fill valve or float problem | Adjust or replace the fill valve |
| Tank water slowly drops and then refills | Flapper, valve seat, or flush valve leak | Check flapper fit and valve seat |
| Flapper never sits completely flat | Wrong flapper, chain issue, or buildup | Correct the flapper installation |
| Water level rises above the marked line | Float or fill valve adjustment problem | Lower the water level |
| Handle feels tight or does not return normally | Chain or handle problem | Adjust chain or handle |
EPA WaterSense recommends checking toilets for silent leaks with a dye test and notes that worn flappers are a common cause of toilet leaks. EPA also recommends replacing flappers at least every five years because the rubber sealing material wears over time.
1. The New Flapper May Not Be the Correct Size
This is one of the first things I would check after installing a replacement flapper.
Toilet flappers are not universally interchangeable. Some toilets use a standard rubber flapper, while others use a canister-style flush valve or a manufacturer-specific seal.
A flapper can look almost identical to the original and still fail to seal correctly.
Look for these symptoms:
- The new flapper sits at an angle.
- The edges do not completely cover the flush valve opening.
- The tank empties slowly even when nobody is flushing.
- The toilet periodically refills by itself.
If the flapper does not sit flat against the valve seat, replacing it again with another generic part may not solve the problem. Match the replacement part to the toilet model or the original component whenever possible.
2. The Flapper Chain May Be Too Tight
A small amount of slack in the chain is necessary. If the chain is too tight, it can hold the flapper slightly open after you release the handle.
This creates a surprisingly common situation: the flapper itself is brand new, but it never gets the chance to form a complete seal.
With the toilet at rest, check whether the chain pulls directly on the flapper. If it does, give the chain a little more slack and flush again.
You want the handle to lift the flapper fully during a flush, while allowing the flapper to drop completely afterward.
3. The Flush Valve Seat May Be Damaged
The flapper needs a smooth, clean surface to seal against. If the flush valve seat is scratched, warped, cracked, or covered with mineral deposits, a new flapper may still leak.
This is particularly worth checking in older toilets or homes with hard water.
Run your finger carefully around the sealing surface with the water supply turned off. Look for rough areas, mineral deposits, or visible damage.
Important: Do not aggressively scrape or damage the sealing surface. If the valve seat is physically damaged, replacing the flush valve assembly may be more reliable than repeatedly changing flappers.
4. The Water Level May Be Too High
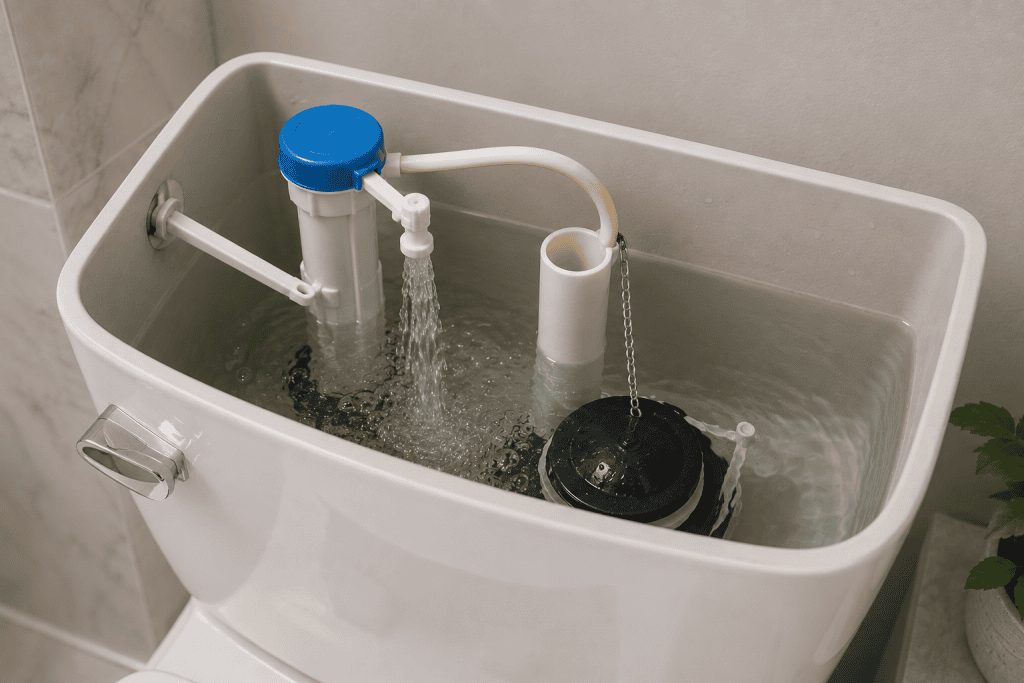
If the tank fills too high, water can spill into the overflow tube. When that happens, the toilet may continue making a running-water sound even though the new flapper is working correctly.
Look inside the tank after the toilet finishes filling. Most toilets have a marked waterline. The water should normally stop below the top of the overflow tube rather than continuously flowing into it.
If water is entering the overflow tube, focus your attention on the fill valve and float instead of the flapper.
EPA WaterSense states that properly functioning toilet components, including flappers, flush valves, and fill valves, are important for preventing leaks and maintaining efficient toilet operation.
5. The Fill Valve May Be the Real Problem
This is the situation many homeowners miss.
The toilet can appear to have a flapper problem because it keeps making a running-water sound. But if the water is actually entering the tank through the fill valve and flowing into the overflow tube, replacing the flapper will not fix it.
A faulty fill valve may:
- Continue running after the tank reaches its normal level.
- Fail to respond correctly to the float.
- Refill the tank intermittently.
- Allow water to enter the overflow tube.
If adjusting the float does not stop the water, replacing the fill valve is usually the more logical repair.
6. The Float May Need Adjustment
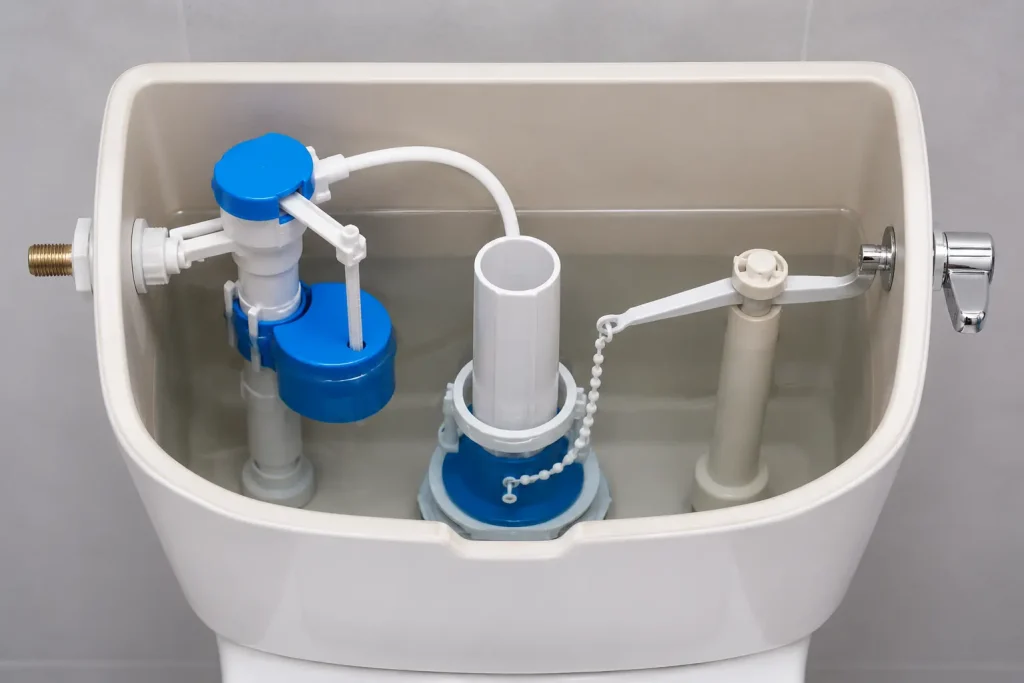
The float tells the fill valve when enough water has entered the tank. Depending on the toilet design, it may be a ball float, cup-style float, or another integrated mechanism.
If the float is set too high, the fill valve may not shut off at the correct point.
Make a small adjustment rather than turning the mechanism aggressively. Then flush the toilet and allow the tank to refill completely.
The goal is simple: the fill valve should stop adding water before water continuously enters the overflow tube.
7. The Flush Valve Assembly May Be Worn Out
If you have already installed the correct flapper, adjusted the chain, checked the water level, and confirmed that the fill valve is functioning, the flush valve itself may be the problem.
Older flush valve assemblies can develop damaged sealing surfaces or other mechanical wear. In that situation, continuing to replace inexpensive flappers may only postpone the real repair.
How to Test a Toilet That Keeps Running
Test 1: The Food Coloring Test
Add a few drops of food coloring to the toilet tank. Do not flush the toilet. Wait about 10 minutes and inspect the bowl.
If colored water appears in the bowl, water is leaking from the tank into the bowl.
EPA WaterSense specifically recommends this type of dye test for detecting silent toilet leaks.
Test 2: Watch the Overflow Tube
Remove the tank lid and observe the water after a flush.
If water continues entering the overflow tube once the tank reaches its normal level, investigate the fill valve and float.
Test 3: Check the Flapper Without Touching It
After the tank has filled, watch the flapper for several minutes.
If it moves, lifts slightly, or fails to sit flat, check the chain and flapper alignment.
Repair Options: Cost, Installation, Maintenance, Pros and Cons
| Repair | Typical DIY Parts Cost | Installation | Maintenance | Advantages | Disadvantages |
|---|---|---|---|---|---|
| Adjust flapper chain | $0 | Easy | Low | Fast and free | Only works if the chain is the problem |
| Replace flapper | $5–$20 | Easy | Low | Inexpensive and quick | Will not fix a damaged valve seat |
| Adjust float | $0 | Easy | Low | Can stop overflow quickly | Not effective if the fill valve has failed |
| Replace fill valve | $15–$60 | Easy to moderate | Low | Fixes many continuous-running problems | Requires shutting off the water supply |
| Replace flush valve | $20–$80+ | Moderate | Low | Useful when the valve seat is damaged | More involved installation |
Actual costs vary by toilet model, replacement part, location, and whether the repair is DIY or performed by a plumber. Treat the figures above as practical planning ranges rather than fixed service prices.
What I Would Check First in a Real Home
If I were troubleshooting this problem in a typical American home, I would not immediately buy another flapper.
I would follow this order:
- First: Remove the tank lid and observe where the water is moving.
- Second: Check whether water is entering the overflow tube.
- Third: Check the flapper’s size, position, and seal.
- Fourth: Check the chain for excessive tension.
- Fifth: Inspect the flush valve seat for buildup or damage.
- Sixth: Adjust or replace the fill valve if it does not shut off properly.
This order saves time because it starts with visual checks and inexpensive adjustments before moving toward more involved repairs.
When Should You Replace the Whole Flush Valve?
A complete flush valve replacement makes more sense when the valve seat is damaged, the assembly is badly worn, or repeated flapper replacements have failed to produce a reliable seal.
For an otherwise good toilet, replacing the flush valve is usually more economical than replacing the entire toilet.
However, if the toilet has cracked porcelain, repeated major failures, poor flushing performance, or extensive corrosion, replacement of the fixture may be worth considering.
Could a Running Toilet Really Waste That Much Water?
Yes. A small toilet leak can become a meaningful water-waste problem when it continues around the clock.
EPA WaterSense reports that household leaks can waste about 180 gallons of water per week, and toilets are often responsible for these leaks.
Modern WaterSense-labeled toilets use no more than 1.28 gallons per flush and are independently certified for both water efficiency and flushing performance.
That does not mean every running toilet wastes exactly the same amount. The actual loss depends on the size of the leak and how long it continues. But the numbers show why a seemingly minor running toilet should not be ignored.
When Is It Better to Call a Plumber?
DIY repair is reasonable when the problem is limited to a flapper, chain, float adjustment, or accessible fill valve.
Consider professional help if:
- The toilet leaks around the base.
- The porcelain tank or bowl is cracked.
- The shut-off valve does not work.
- The flush valve requires extensive disassembly.
- The toilet continues running after several component replacements.
- You suspect a problem inside the wall or drain system.
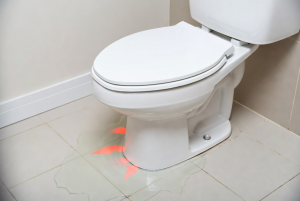
Water around the base should not be confused with an ordinary tank leak. It can indicate a connection or seal problem that deserves closer inspection.
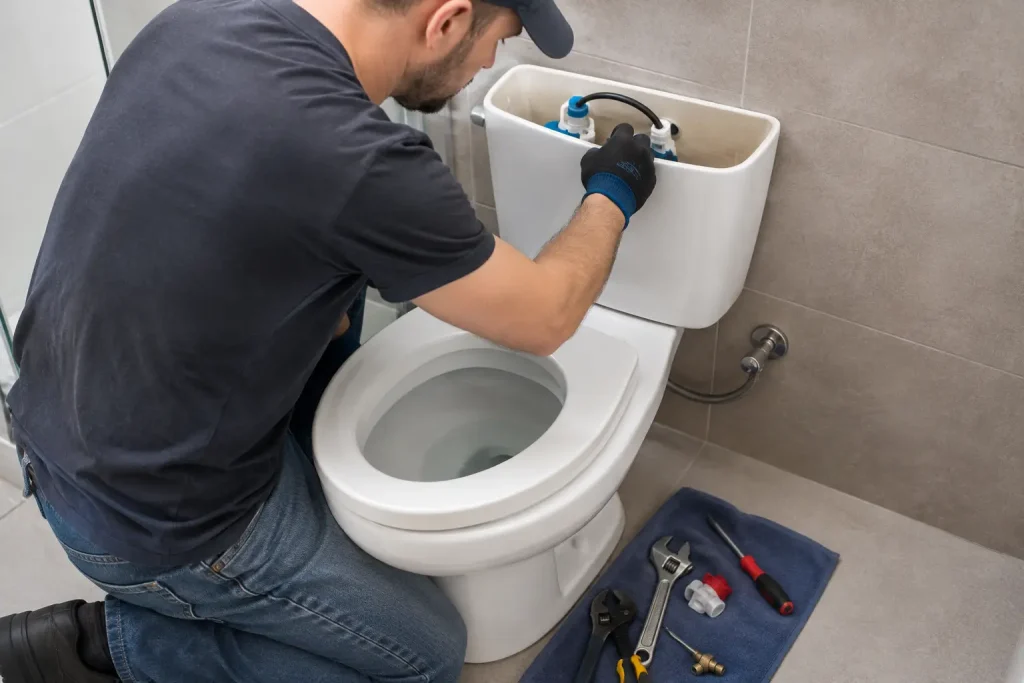
Related Toilet Maintenance Content
Frequently Asked Questions
1. Why is my toilet still running after I installed a new flapper?
A new flapper does not rule out other problems. Check the flapper’s fit, chain tension, flush valve seat, water level, fill valve, and float. If water is entering the overflow tube, the fill system is more likely to be responsible.
2. How do I know whether the flapper or fill valve is causing the problem?
Watch the tank after flushing. If the tank water slowly drops into the bowl, suspect the flapper or flush valve seal. If water keeps entering through the fill valve and flows into the overflow tube, investigate the fill valve or float.
3. Can a new flapper still leak?
Yes. A replacement flapper can leak if it is the wrong type, installed incorrectly, pulled by a tight chain, obstructed by mineral deposits, or unable to seal against a damaged flush valve seat.
4. How long should a toilet flapper last?
Service life varies with water quality, usage, and the material of the flapper. EPA WaterSense recommends replacing toilet flappers at least every five years to help maintain a good seal and reduce leaks.
5. Should I replace the toilet if it keeps running?
Usually not. If the porcelain is sound and the toilet flushes properly, repairing the flapper, fill valve, or flush valve is normally more practical. Consider replacing the entire toilet when it has structural damage, repeated major failures, or poor overall performance.
Conclusion
If your toilet keeps running after you replace the flapper, do not assume you bought another bad flapper. The real problem may be the chain, flush valve seat, water level, float, or fill valve.
The most useful troubleshooting step is to watch the tank after flushing. Find out whether water is leaking into the bowl or continuously entering the overflow tube. Once you know where the water is going, the correct repair becomes much easier to identify.
Fixing the problem promptly is worth the effort. A running toilet can waste a surprising amount of water, while most common causes can be repaired with inexpensive replacement parts and a few basic tools.