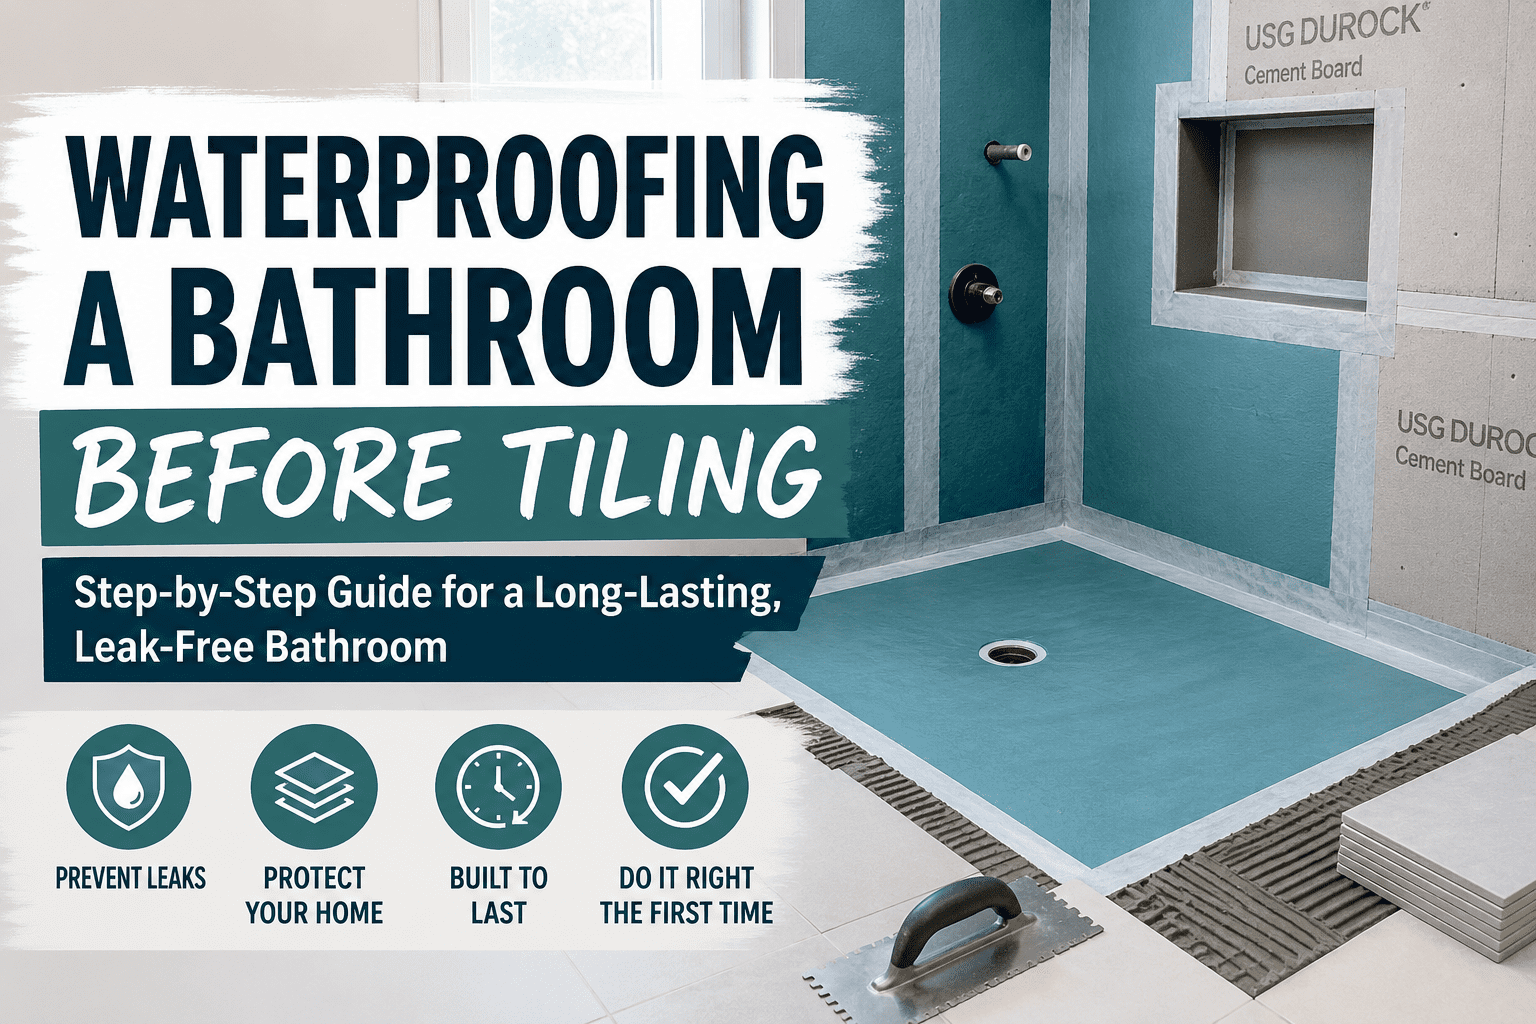
Waterproofing a bathroom before tiling is one of the most important steps in any successful bathroom renovation. It is the hidden layer that protects your home from moisture damage, mold growth, and expensive structural repairs. While tile and grout create a beautiful finish, they are not truly waterproof. Water can slowly penetrate through grout joints, corners, and fixture penetrations unless a dedicated waterproof membrane is installed underneath.
After inspecting bathroom leaks and supervising renovation projects for many years, I have found that homeowners often spend thousands of dollars on premium tiles while overlooking the one step that matters most: waterproofing. In real-world projects, the quality of the waterproofing system usually determines whether a bathroom lasts five years or twenty-five years.
For more expert guides, visit our Bathroom Waterproofing category, where we cover membranes, repair methods, and common installation mistakes in detail.
Quick Answer: How to Waterproof a Bathroom Before Tiling
To waterproof a bathroom before tiling, prepare a stable substrate, reinforce corners and penetrations, apply a certified waterproof membrane, allow it to cure completely, and perform a 24-hour flood test before installing tile.</p >
- Prepare and clean the substrate.
- Create proper floor slope toward the drain.
- Seal corners, joints, and pipe penetrations.
- Apply liquid or sheet waterproof membrane.
- Allow full curing according to manufacturer instructions.
- Conduct a 24-hour flood test.
- Install tile using compatible thin-set mortar.
Why Waterproofing Before Tiling Is Essential
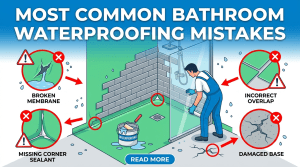
Many people assume porcelain tile creates a waterproof barrier. In practice, grout joints are porous, and even sealed grout allows a small amount of moisture to pass through. Over time, repeated exposure to water can saturate cement board, subfloors, and wall framing.
This hidden moisture often causes:
- Mold and mildew growth
- Musty odors
- Loose or hollow-sounding tiles
- Wood rot and swollen subfloors
- Peeling paint in adjacent rooms
- Ceiling stains below the bathroom
- Costly structural repairs
Our article What Happens If Bathroom Waterproofing Fails? explains how minor leaks can evolve into major renovations.
Which Areas of the Bathroom Should Be Waterproofed?
| Area | Waterproofing Required? | Priority | Typical Risk if Ignored |
|---|---|---|---|
| Shower floor | Yes | Critical | Immediate leak potential |
| Shower walls | Yes | Critical | Moisture behind tile |
| Bathroom floor | Recommended | High | Overflow damage |
| Bathtub surround | Yes | High | Hidden wall damage |
| Wall behind vanity | Optional | Moderate | Localized moisture |
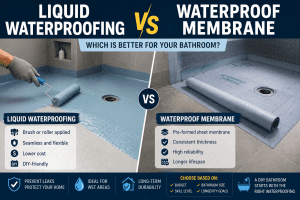
Best Waterproofing Materials Before Tiling
| Material | Typical Cost | Installation Difficulty | Maintenance | Advantages | Disadvantages |
|---|---|---|---|---|---|
| Liquid Waterproof Membrane | $1.50–$4.00/sq ft | Moderate | Very Low | Seamless, DIY-friendly, flexible | Requires proper thickness |
| Sheet Membrane | $3.00–$8.00/sq ft | Advanced | Very Low | Uniform thickness, highly reliable | Higher material cost |
| Cementitious Waterproofing | $1.00–$3.00/sq ft | Moderate | Low | Affordable and durable | Less flexible in movement areas |
| Polyurethane Coating | $4.00–$8.00/sq ft | Advanced | Very Low | Exceptional flexibility | More expensive |
If you want a detailed explanation of how membranes work, read Bathroom Waterproofing Membrane Explained.
Tools and Materials You Will Need
- Cement backer board or approved substrate
- Waterproof membrane
- Primer (if required)
- Reinforcing tape or fabric
- Roller and brush
- Trowel
- Utility knife
- Drain plug for flood testing
- Silicone sealant
- Thin-set mortar
Step 1: Prepare the Substrate
The surface must be clean, dry, and structurally sound. Dust, loose particles, oils, and soap residue can prevent the membrane from bonding properly.
In one renovation project, a contractor skipped this step and applied membrane over dusty cement board. Within two years, the coating began peeling near the shower valve, allowing water to enter the wall cavity.
Step 2: Ensure Proper Shower Floor Slope
Shower floors should slope approximately 1/4 inch per foot toward the drain. This slope ensures water flows efficiently and prevents pooling beneath the tile assembly.
Step 3: Reinforce Corners and Penetrations
The most common leak points are:
- Wall-to-floor transitions
- Inside corners
- Pipe penetrations
- Shower niches
- Benches
- Drain flanges
Use reinforcing tape or fabric embedded into the first coat of membrane to strengthen these critical areas.
Step 4: Apply the Waterproof Membrane
Follow the manufacturer’s coverage requirements precisely. Most liquid membranes require two coats applied in opposite directions.
The most common DIY mistake is applying the membrane too thin. A coating that looks complete may still be below the required thickness for effective waterproofing.
Step 5: Allow Full Curing
Depending on humidity and product type, curing may take 24 to 72 hours. Tiling too early can trap moisture and compromise membrane performance.
Step 6: Perform a 24-Hour Flood Test
Plug the drain and fill the shower base with water. Mark the water level and inspect after 24 hours. Any drop indicates a leak that must be repaired before tiling.
Our guide ‘What to Do If Bathroom Waterproofing Fails?’ explains the measures to take if tests reveal problems.How to Repair Failed Bathroom Waterproofing explains what to do if the test reveals a problem.
Step 7: Install Tile
Once the waterproofing passes inspection, tile can be installed using a compatible thin-set mortar. At this stage, the waterproof layer is fully protected and ready for decades of service.
Real-World Experience: A Flood Test That Saved Thousands
I once worked with a homeowner who had completed all waterproofing and was ready to tile a custom walk-in shower. We decided to perform a flood test before moving forward. After 12 hours, the water level had dropped by less than 1/8 inch.
The issue turned out to be a small pinhole where reinforcing fabric overlapped near the drain. Repairing it took less than one hour and less than $20 in materials. If tile had already been installed, the leak could have caused extensive ceiling damage below.
DIY vs Professional Installation
| Factor | DIY | Professional |
|---|---|---|
| Material Cost | $150–$800 | Included in project price |
| Labor Cost | None | $1,500–$6,000+ |
| Warranty | Usually none | Often included |
| Risk Level | Moderate to High | Lower when experienced |
| Best For | Experienced DIYers | Complex or high-value bathrooms |
How to Choose the Right Waterproofing Method
- Small guest bathroom: Liquid membranes are cost-effective and easy to apply.
- Luxury walk-in shower: Sheet membranes provide the highest consistency.
- DIY renovation: Liquid systems offer flexibility and simpler installation.
- Steam shower: Specialized sheet membranes are generally preferred.
- Rental property: Durable cementitious systems can be economical.
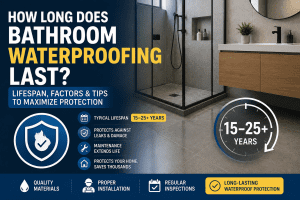
How Long Does Bathroom Waterproofing Last?
When installed correctly, most waterproofing systems last 10 to 25 years or longer. Lifespan depends on workmanship, substrate quality, product type, and ongoing maintenance.
Industry Standards and Technical Guidance
About Our Experience
Frequently Asked Questions
1. Is waterproofing mandatory before tiling?
In all shower areas, yes. Even where local codes are less explicit, waterproofing is considered industry best practice.
2. Can I tile directly over waterproof membrane?
Yes, as long as the membrane is designed for tile applications and has cured fully.
3. How long should waterproofing cure before tiling?
Typically 24 to 72 hours, depending on product type and environmental conditions.
4. What is the easiest waterproofing system for beginners?
Liquid-applied membranes are generally the most accessible option for DIY homeowners.
5. Is a flood test really necessary?
Absolutely. It is the simplest and most effective way to verify waterproofing integrity before tile covers the system.
Conclusion
Waterproofing a bathroom before tiling is the most important hidden step in any bathroom renovation. While it may never be visible after the project is complete, it is the layer that determines whether your bathroom remains dry and durable for decades or develops leaks within a few years.
From my experience, the most successful renovations share one common trait: careful attention to waterproofing details. When the substrate is prepared properly, the membrane is applied to the correct thickness, and the system is flood-tested before tiling, homeowners gain lasting protection and peace of mind.