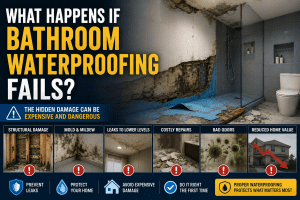
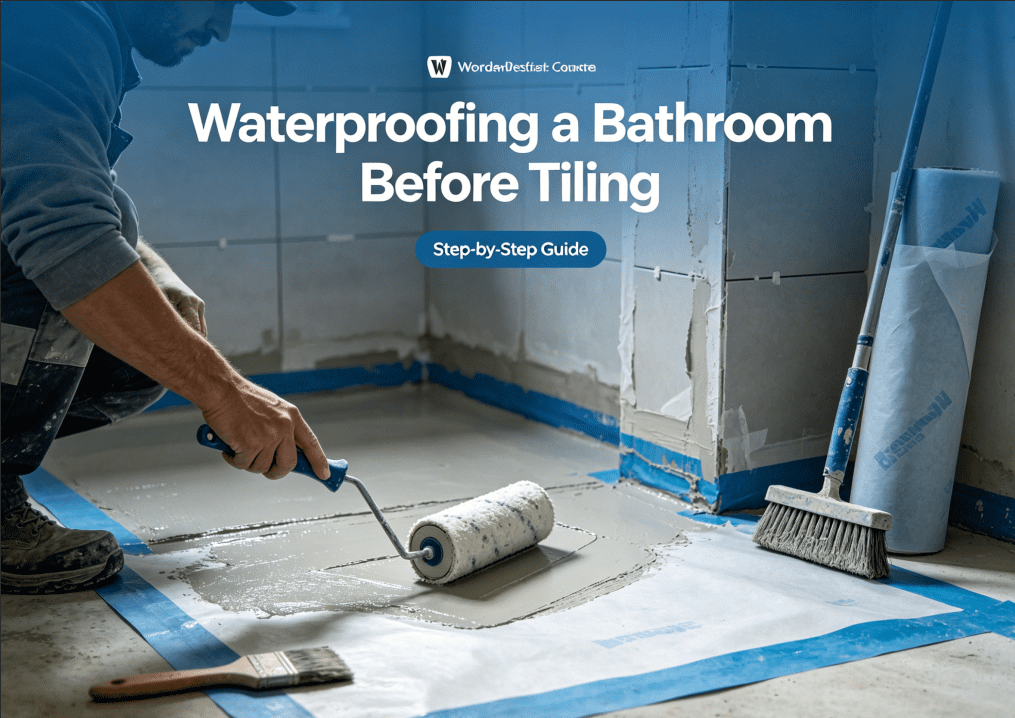
Waterproofing a bathroom before tiling is one of the most critical steps in any bathroom renovation. Tiles and grout may look watertight, but they are not true waterproof barriers. Over time, water can penetrate through grout joints, hairline cracks, and movement around plumbing fixtures. Without a properly installed waterproof membrane underneath, moisture will eventually reach the subfloor and walls, leading to mold, wood rot, structural damage, and expensive repairs.
After more than 15 years of hands-on experience in bathroom remodeling and leak diagnostics, I can confidently say that the most durable bathrooms are not necessarily the most expensive ones—they are the ones where waterproofing was done correctly before the first tile was ever installed.
For additional technical resources and renovation guidance, visit our Bathroom Waterproofing category.
Quick Answer: Do You Need to Waterproof a Bathroom Before Tiling?
Yes—every bathroom should be waterproofed before tiling. The proper process involves preparing the substrate, applying a certified waterproof membrane, reinforcing all corners and pipe penetrations, performing a flood test, and only then installing tile.
- Tiles and grout are water-resistant, not waterproof.
- Waterproof membranes protect the structure underneath.
- All wet areas should be treated before tile installation.
- A 24-hour flood test confirms system integrity.
- Proper waterproofing can last 10–25 years or more.
Why Tiling Alone Is Not Enough
Many homeowners assume ceramic or porcelain tiles prevent water from reaching the structure. In reality, grout is porous, silicone joints eventually age, and small cracks are inevitable as buildings move.
In one renovation project I inspected, a newly tiled shower looked perfect on the surface, yet the plywood subfloor underneath was already soft because the installer skipped the waterproof membrane. The repair required complete demolition only two years after installation.
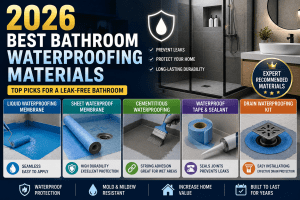
Comparison Table: Waterproofing Systems Before Tiling
| Waterproofing System | Typical Cost | Installation Difficulty | Maintenance | Advantages | Disadvantages |
|---|---|---|---|---|---|
| Liquid Waterproof Membrane | $$ | Moderate | Low | Seamless and ideal for corners and penetrations | Requires correct film thickness and curing time |
| Sheet Membrane | $$$ | Advanced | Very Low | Uniform thickness and excellent reliability | Higher material and labor cost |
| Cementitious Waterproofing | $ | Moderate | Low | Affordable and easy to source | Less flexible under movement |
| Polyurethane Waterproofing | $$$$ | Moderate | Very Low | Outstanding flexibility and crack bridging | Premium price |
Step 1: Prepare the Surface Properly
Waterproof membranes adhere only as well as the surface beneath them. The substrate must be clean, dry, structurally sound, and free of dust, oils, and loose materials.
- Repair cracks and voids
- Ensure proper floor slope toward the drain
- Prime the surface if required by the manufacturer
- Allow fresh mortar beds to cure completely
If you’re working on a full floor system, our How to Waterproof a Bathroom Floor Properlyguide explains substrate preparation in greater detail.
Step 2: Reinforce Corners and Pipe Penetrations
The most common waterproofing failures occur where different surfaces meet.
- Wall-to-floor junctions
- Inside corners
- Pipe penetrations
- Floor drains
- Shower niches and benches
Professional installers embed reinforcing tape or preformed corner accessories into the first coat of waterproofing material.
Step 3: Apply the Waterproof Membrane
Once all details are reinforced, apply the chosen waterproofing system according to the manufacturer’s specifications.
Most liquid membranes require two coats, each applied perpendicular to the previous coat to ensure complete coverage.
For a full technical breakdown, see Bathroom Waterproofing Membrane Explained.
Step 4: Extend Waterproofing to the Correct Height
In shower areas, membranes should extend from the floor to the full height of the shower walls. Outside the shower, it is standard practice to run the membrane at least 6–12 inches up surrounding walls.
This creates a watertight basin and prevents leaks at perimeter joints.
Step 5: Allow Proper Curing Time
One of the most common DIY mistakes is tiling before the membrane has fully cured. Depending on temperature, humidity, and product type, curing may take 12 to 48 hours or longer.
Applying tile adhesive too early can trap moisture and compromise adhesion.
Step 6: Perform a 24-Hour Flood Test
A flood test verifies that the waterproofing system is fully sealed before tile installation. The drain is plugged, the shower base is filled with water, and the water level is monitored for at least 24 hours.
If the level remains unchanged, the system is ready for tiling.
Real-World Experience: The $15 Step That Prevented a $7,000 Repair
During a recent bathroom renovation, a flood test revealed a slow leak around the shower mixing valve. The issue was traced to a missing pipe collar that cost less than $15.
Had the shower been tiled without testing, the leak would likely have remained hidden for years and caused significant structural damage.
Typical Waterproofing Costs Before Tiling
| Bathroom Size | DIY Materials | Professional Installation | Expected Lifespan |
|---|---|---|---|
| 40–60 sq ft | $150–$500 | $1,000–$3,500 | 10–25+ years |
| 60–100 sq ft | $250–$800 | $1,500–$5,000 | 15–30 years |
Common Mistakes When Waterproofing Before Tiling
- Installing tile directly over cement board without a membrane
- Skipping reinforcement tape
- Applying only one thin coat
- Ignoring pipe penetrations
- Not allowing sufficient curing time
- Failing to flood test
More examples are discussed in Most Common Bathroom Waterproofing Mistakes.
Which Waterproofing Method Should You Choose?
| Your Situation | Recommended Solution |
|---|---|
| DIY renovation | Liquid waterproof membrane |
| Premium tiled shower | Sheet membrane system |
| Concrete substrate | Cementitious waterproofing |
| High-movement structures | Polyurethane waterproofing |
| Complex layouts with niches | Liquid membrane with reinforcing accessories |
Industry Standards and Professional Guidance
About Our Expertise
Frequently Asked Questions
1. Is waterproofing mandatory before tiling a bathroom?
In most professional installations and many building codes, yes—especially in showers and wet areas.
2. Can tile adhesive act as waterproofing?
No. Thin-set mortar provides adhesion only and does not replace a waterproof membrane.
3. How long should waterproofing cure before tiling?
Most systems require 12–48 hours, depending on the product and site conditions.
4. What is the best waterproofing method for DIY projects?
Liquid-applied membranes are usually the most beginner-friendly and cost-effective option.
5. Is flood testing really necessary?
Absolutely. It is the best way to confirm the waterproofing system is leak-free before tiles hide any defects.
Conclusion
Waterproofing a bathroom before tiling is not optional—it is the foundation of a durable, leak-free installation. Tiles provide the visible finish, but the membrane beneath them is what truly protects your home.
From my professional experience, homeowners who invest in proper waterproofing and flood testing enjoy bathrooms that remain trouble-free for decades. The time and cost involved before tiling are minimal compared with the expense of repairing hidden water damage later.