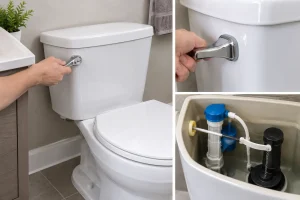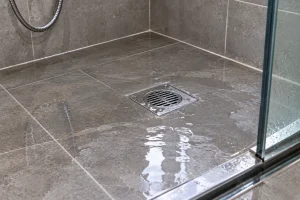
A wood-framed bathroom floor needs more than a waterproof coating to stay dry and structurally sound. Wood can move with changes in moisture, temperature, and humidity, so the waterproofing system has to do two jobs at once: keep liquid water away from the wood structure and accommodate the movement that naturally occurs in a framed floor assembly.
This is why choosing a waterproofing system for a wood-framed bathroom is different from waterproofing a concrete slab. A system that performs well over concrete may require additional preparation or a different installation method over plywood or OSB.
For most residential bathrooms, the best approach is not simply one waterproofing product. It is a complete waterproofing assembly consisting of a sound wood subfloor, properly installed underlayment or backer board where required, waterproofing at wet areas, sealed seams and penetrations, and a compatible tile or flooring system.
In this guide, I’ll compare the most common waterproofing approaches for wood-framed bathroom floors, explain where each system works best, and show you how I would choose between them for a real bathroom renovation.
Quick Answer: What Waterproofing System Is Best?
For a wood-framed bathroom floor, a properly installed sheet membrane or a compatible liquid-applied waterproofing system is usually a better choice than relying on waterproof paint or a basic surface coating.
For a tiled shower, I generally prefer a purpose-designed shower waterproofing system that provides continuous waterproofing across the walls, floor, corners, seams, and penetrations.
For the main bathroom floor outside the shower, the strategy depends on the finished flooring. A bathroom with tile requires a different assembly from one using sheet vinyl or another water-resistant flooring product.
| Waterproofing System | Typical Cost | Installation Difficulty | Movement Tolerance | Best Application |
|---|---|---|---|---|
| Sheet membrane | $$ | Moderate | Excellent when properly installed | Tile showers and wet areas |
| Liquid-applied membrane | $–$$ | Moderate | Good when correctly applied | Complex corners and irregular areas |
| Waterproof backer board/system | $$ | Moderate | Good as part of a complete system | Shower walls and wet areas |
| Cement backer board alone | $ | Moderate | Not waterproof by itself | Tile substrate when separately waterproofed |
| Waterproof paint/coating | $ | Easy | Limited | Secondary protection, not primary shower waterproofing |
Important: cement backer board is not automatically waterproof. It can provide a suitable tile substrate, but the joints, corners, fastener penetrations, and surrounding assembly still need an appropriate waterproofing strategy.
Why Wood-Framed Bathroom Floors Need Special Waterproofing
A wood-framed floor behaves differently from concrete.
When moisture enters a wood floor assembly, the problem is not limited to the visible flooring. Water can migrate into the subfloor, framing, insulation cavities, and areas around plumbing penetrations.
Repeated wetting can contribute to swelling, deterioration, mold growth, and loss of structural performance if the assembly remains wet for an extended period.
There is also another issue that is easy to overlook: movement.
Wood framing expands and contracts with changes in moisture content. Floor assemblies can also experience small amounts of deflection when people walk across them. Tile and grout are relatively rigid, so the entire assembly needs to be designed to control movement.
This means waterproofing is only one part of a successful bathroom floor installation.
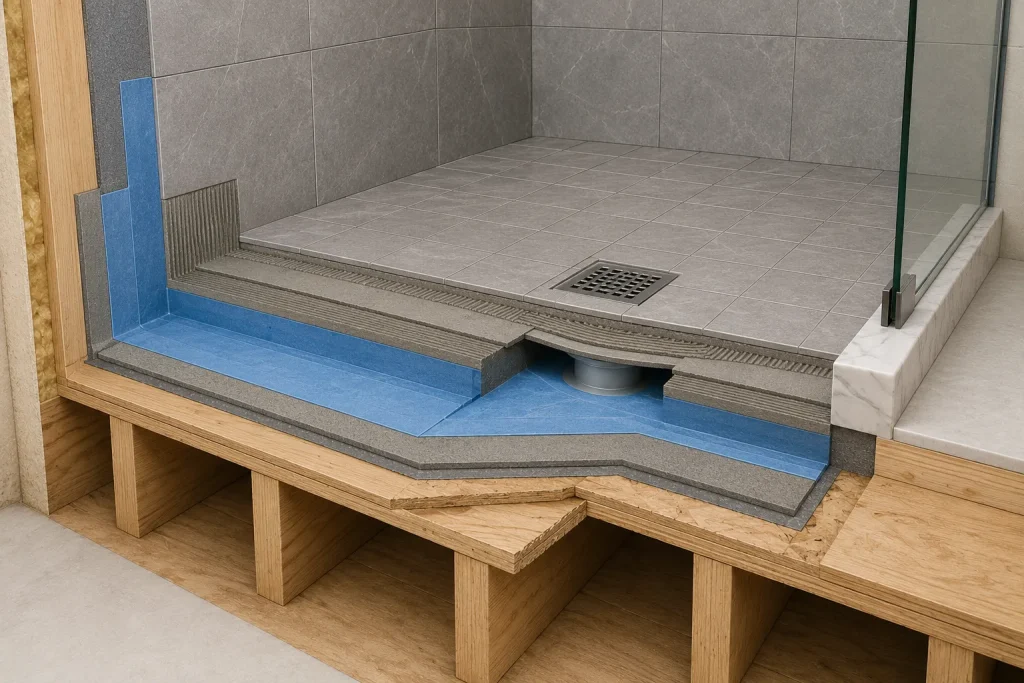
The Main Waterproofing Options for a Wood-Framed Bathroom
1. Sheet Waterproofing Membrane
Sheet membranes are manufactured waterproofing sheets installed over an appropriate substrate. Depending on the system, seams may be bonded with thin-set mortar, proprietary adhesive, or other approved materials.
One major advantage is consistency. The membrane has a defined thickness when manufactured, so the installer does not have to create the waterproofing layer entirely by applying liquid material to the correct thickness.
Sheet membranes are particularly attractive for shower floors and walls where continuous waterproofing is required.
Advantages:
- Consistent manufactured thickness
- Highly effective when seams are properly treated
- Suitable for many tiled shower assemblies
- Can provide continuous waterproofing over an appropriate substrate
- Useful for protecting wood framing from shower moisture
Potential disadvantages:
- Material cost can be higher
- Installation requires careful handling
- Seams and penetrations must be treated correctly
- Improper bonding can compromise the system
For a standard tiled shower over a wood-framed structure, a complete sheet membrane system is one of the options I would seriously consider first.
2. Liquid-Applied Waterproofing Membrane
Liquid waterproofing membranes are applied with a roller, brush, or other approved application method and cure into a continuous membrane.
The biggest practical advantage is flexibility during installation. A liquid membrane can follow corners, transitions, niches, penetrations, and other irregular shapes without requiring the installer to cut a sheet around every detail.
However, the installer has to apply the material according to the manufacturer’s specified coverage and thickness.
Applying a liquid membrane too thin can leave weak areas. Applying it too heavily or failing to allow the required curing time can also create installation problems.
Advantages:
- Works well around irregular shapes
- Easy to detail around many penetrations
- No large sheet to position
- Can be useful for complicated shower layouts
Potential disadvantages:
- Final membrane thickness depends on installation
- Requires proper drying or curing time
- Coverage must be controlled carefully
- Improper application can create thin spots
3. Waterproof Backer Board Systems
Some modern shower systems use waterproof or water-resistant boards as part of a complete manufacturer’s system.
These products can simplify shower construction because the board may provide both the substrate and waterproofing function when installed according to the manufacturer’s instructions.
However, the word “waterproof” should not lead you to ignore the seams and penetrations.
The entire system matters. Board joints, inside corners, outside corners, fasteners, pipe penetrations, and transitions all need to be treated according to the system requirements.
4. Cement Backer Board With Separate Waterproofing
Cement backer board has been widely used as a tile substrate in bathrooms, but it should not automatically be considered the waterproofing layer.
A common approach is to install the backer board and then apply an approved waterproofing membrane over it.
This can be a reliable assembly when the framing, substrate, board installation, membrane, seams, and penetrations are all installed correctly.
The important distinction is simple: a tile substrate and a waterproofing layer are not necessarily the same thing.
5. Waterproof Paint or Basic Coating
This is where homeowners can easily spend money in the wrong place.
A product marketed as “waterproof paint” may provide useful moisture resistance in certain applications, but that does not make it equivalent to a purpose-designed shower waterproofing membrane.
I would not rely on ordinary waterproof paint as the primary waterproofing system beneath a tiled shower floor.
A shower floor receives repeated water exposure, and the waterproofing system must handle seams, corners, drains, and penetrations—not simply cover a flat surface.
Sheet Membrane vs. Liquid Membrane
| Factor | Sheet Membrane | Liquid Membrane |
|---|---|---|
| Application | Install pre-manufactured sheets | Apply liquid coating in specified layers |
| Thickness consistency | Highly consistent | Depends on application |
| Complex corners | Requires careful detailing | Often easier to shape |
| Seams | Require proper overlap/bonding | Requires correct coating coverage |
| Drying time | Generally not dependent on liquid coating cure | Requires appropriate curing/drying |
| DIY learning curve | Moderate | Moderate |
| Best use | Complete shower waterproofing systems | Detailed or irregular wet areas |
Neither system is automatically “better” in every situation. The installation quality and compatibility of the complete system are more important than choosing a membrane based solely on whether it is sheet or liquid.
What About the Bathroom Floor Outside the Shower?
This is an important distinction.
The main bathroom floor does not receive the same continuous water exposure as a shower floor. A toilet overflow, bathtub splash, leaking supply line, or wet towel can still introduce water, but the waterproofing requirements depend heavily on the flooring system and building assembly.
For a tiled bathroom floor over wood framing, I would focus on:
- Properly supported subfloor
- Correct tile underlayment
- Appropriate movement accommodation
- Water-resistant treatment at relevant transitions
- Sealed plumbing penetrations
- Proper transition detailing around the tub or shower
Do not assume that simply painting a waterproof coating across the entire plywood floor automatically creates a professional waterproofing system.
Why Subfloor Preparation Matters More Than Many Homeowners Expect
Waterproofing cannot compensate for a weak or poorly prepared floor.
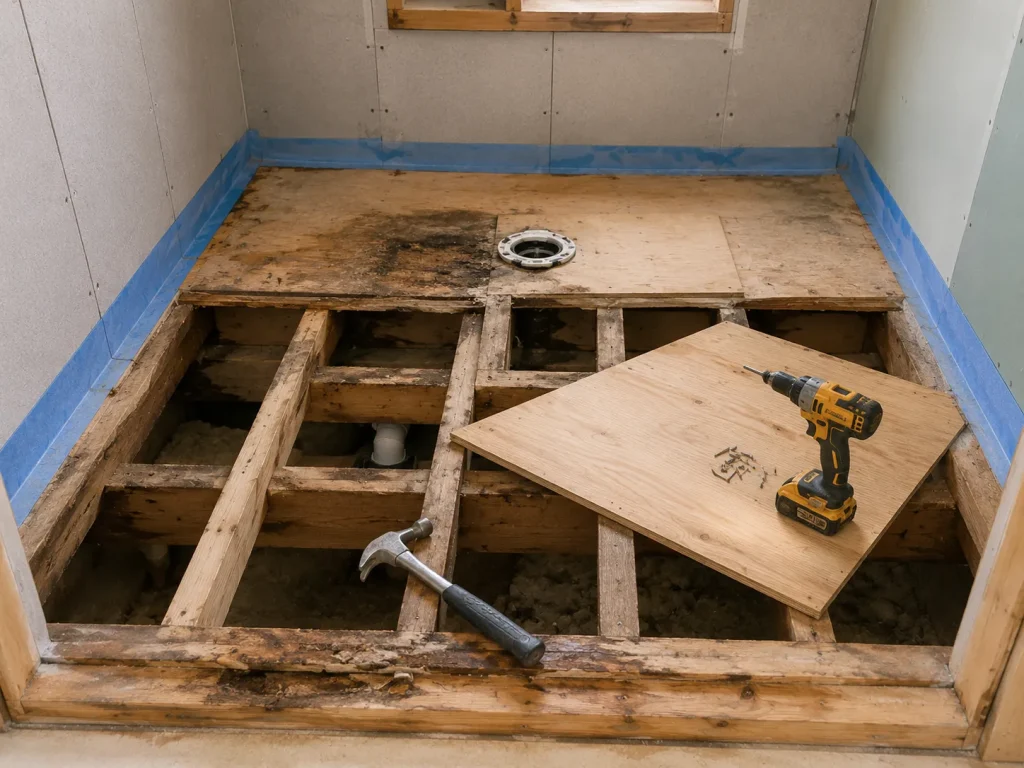
Before installing a membrane, inspect the wood-framed floor for movement, damaged plywood or OSB, loose fasteners, uneven areas, and signs of previous water damage.
If the floor flexes noticeably under normal foot traffic, installing a premium waterproofing membrane does not solve the underlying structural problem.
Fix the floor assembly first.
This is especially important when installing tile. Tile assemblies perform best when the substrate provides adequate support and limits movement.
How to Waterproof a Wood-Framed Shower Floor
A typical tiled shower over a wood-framed floor should be treated as a complete system rather than a collection of unrelated products.
The basic sequence is:
- Inspect and strengthen the framing and subfloor as required.
- Install the approved shower substrate.
- Install the waterproofing system according to its manufacturer’s instructions.
- Seal corners, seams, fasteners, and penetrations.
- Integrate the waterproofing with the shower drain.
- Perform the required water or flood test before covering the system.
- Install the tile and finished surface.
The exact sequence depends on the waterproofing system. Always follow the manufacturer’s published installation requirements rather than mixing components from unrelated systems.
The Shower Drain Is a Critical Waterproofing Detail
A shower waterproofing system can be installed perfectly across the floor and still fail if the drain connection is poorly detailed.
The membrane must integrate correctly with the drain assembly so that water reaching the waterproofing layer has a controlled path toward the drain.
This is one reason I prefer using a complete shower waterproofing system with compatible drain components rather than combining random membranes, drains, adhesives, and sealants from different manufacturers.
Real-world experience: when inspecting a bathroom renovation, I pay particular attention to the drain, corners, and pipe penetrations. Large flat areas are usually easy to waterproof. Small transitions are where installation mistakes tend to concentrate.
Do You Need a Waterproofing System Under the Entire Bathroom Floor?
Not necessarily.
The correct answer depends on the bathroom layout, flooring material, local requirements, and the manufacturer’s installation system.
A shower area requires a much more robust waterproofing strategy than a dry section of bathroom floor.
For example, a bathroom with a fully enclosed shower may concentrate the primary waterproofing system inside the shower enclosure, while the surrounding floor uses an appropriate tile underlayment and flooring assembly.
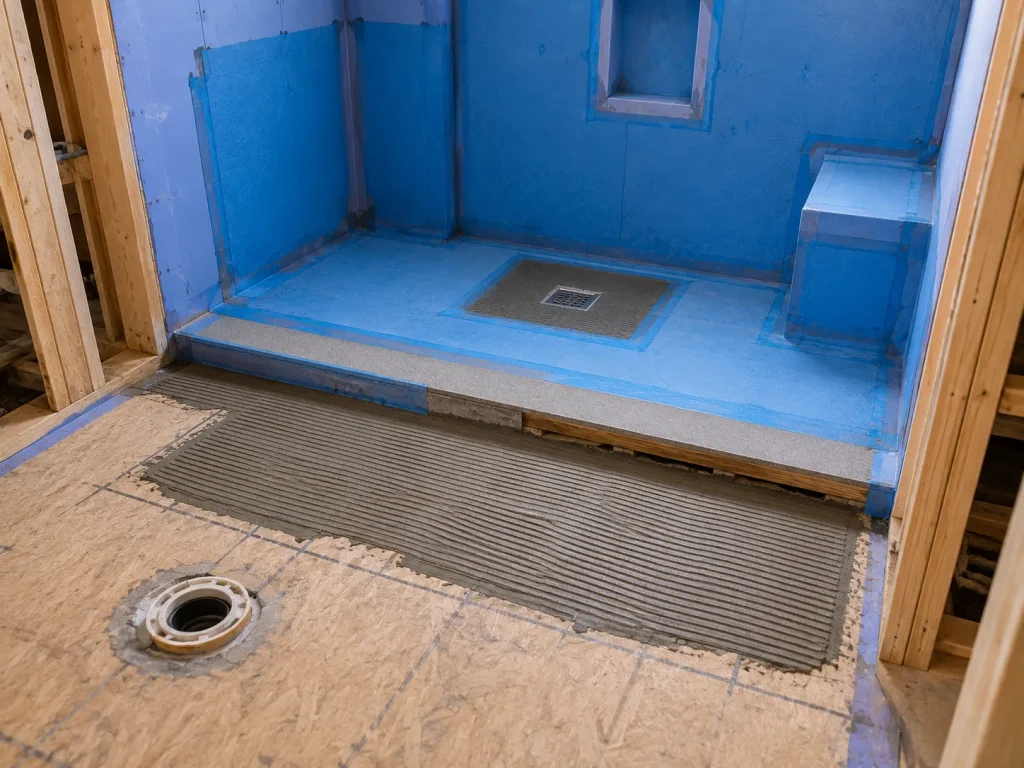
A curbless or wet-room-style bathroom is different. Because water can reach much more of the floor, the waterproofing strategy needs to extend across a larger continuous area and include properly detailed transitions.
Best Waterproofing System by Bathroom Scenario
| Bathroom Scenario | Recommended Direction | Why |
|---|---|---|
| Standard tiled shower | Complete sheet or liquid membrane system | Continuous protection at wet areas |
| Curbless shower | Full integrated waterproofing system | Water can reach a larger floor area |
| Wet-room bathroom | Continuous floor and wall waterproofing | Multiple surfaces receive regular water exposure |
| Tile floor outside shower | Proper underlayment + appropriate moisture protection | Lower direct water exposure |
| Bathroom with previous water damage | Repair substrate before waterproofing | Membrane cannot repair damaged wood |
| Small DIY bathroom renovation | Complete compatible waterproofing system | Reduces compatibility and detailing problems |
What Waterproofing Mistakes Cause the Most Problems?
1. Treating Cement Board as the Waterproofing Layer
Cement backer board can be an excellent tile substrate, but it does not automatically create a waterproof shower assembly.
2. Ignoring Screw and Fastener Penetrations
Every penetration through a waterproofing system needs to be handled according to the system’s requirements.
3. Leaving Corners Untreated
Inside corners, outside corners, and changes of plane need careful detailing. These areas experience movement and are common locations for installation errors.
4. Poor Drain Integration
The membrane needs a compatible connection to the drain assembly. Simply coating around the drain opening is not an adequate substitute for proper integration.
5. Waterproofing Over Damaged Wood
Rotten, swollen, or structurally compromised plywood should not simply be covered with a membrane.
Replace or repair damaged material first.
6. Mixing Incompatible Products
Using a membrane from one manufacturer with an adhesive, drain, sealant, or accessory from another system can create compatibility problems.
When possible, use a complete system and follow one manufacturer’s installation instructions from beginning to end.
How Much Does Bathroom Waterproofing Cost?
The cost depends heavily on the size of the bathroom, the waterproofing system, the flooring, the shower design, labor rates, and how much substrate repair is required.
| Project Type | Relative Material Cost | Labor Complexity | Potential Hidden Cost |
|---|---|---|---|
| Simple bathroom floor moisture protection | $ | Low–Moderate | Subfloor repairs |
| Standard tiled shower | $$ | Moderate | Drain and corner detailing |
| Curbless shower | $$–$$$ | High | Floor slope and drain integration |
| Full wet room | $$$ | High | Extensive waterproofing transitions |
These are relative cost categories rather than fixed national prices. In a wood-framed bathroom, substrate repair can significantly increase the project cost if previous moisture has damaged the floor.
Should You Use a Sheet or Liquid Waterproofing Membrane?
If you are deciding between the two for a typical tiled shower, I would make the decision based on the installation conditions and your ability to follow the system requirements.
Choose a sheet membrane when:
- You want a manufactured membrane with consistent thickness.
- You are comfortable carefully detailing seams.
- You are using a complete shower waterproofing system.
- The shower layout is relatively straightforward.
Choose a liquid membrane when:
- The shower contains many irregular corners or transitions.
- You prefer applying a continuous coating.
- You can accurately control application thickness.
- You are prepared to follow the required curing and coverage specifications.
The best system is the one you can install correctly and completely.
How Long Should a Bathroom Waterproofing System Last?
A properly designed and installed waterproofing assembly can remain functional for many years, but there is no universal expiration date for every membrane system.
The service life depends on the membrane, substrate, installation quality, drainage, movement, exposure, and whether the system has been damaged during subsequent work.
One important point is often overlooked: waterproofing can be damaged after installation.
A contractor installing cabinets, grab bars, glass enclosures, shelves, or other bathroom fixtures can accidentally penetrate a waterproofing layer.
That is why documentation and careful coordination matter even after the original waterproofing work is finished.
A Practical Example: Choosing Waterproofing for a Second-Floor Bathroom
Imagine a second-floor bathroom in a wood-framed American home. The homeowner wants a tiled shower with a curbless entry and large-format porcelain tile.
This is not the situation where I would simply paint waterproofing onto plywood and start setting tile.
The wood-framed floor needs to provide appropriate support. The shower floor needs the correct slope toward the drain. The waterproofing needs to cover the wet area continuously and connect correctly to the drain. Corners, seams, pipe penetrations, and the curbless transition all need to be detailed as part of one system.
Because water can leave the shower area more easily in a curbless design, I would also pay much more attention to the waterproofing transition between the shower and the rest of the bathroom floor.
This is a good example of why “Which waterproofing product is best?” is not quite the right question.
The better question is: Which complete waterproofing assembly is appropriate for this floor structure, shower design, and finished flooring?
Waterproofing Checklist for a Wood-Framed Bathroom
- Inspect the wood framing and subfloor before installation.
- Repair water-damaged or structurally compromised wood.
- Confirm the floor assembly is appropriate for the intended finish.
- Choose a compatible waterproofing system.
- Follow the manufacturer’s installation instructions.
- Detail corners and changes of plane carefully.
- Seal or treat penetrations according to the system requirements.
- Integrate the waterproofing with the shower drain.
- Do not assume cement backer board is waterproof.
- Do not rely on ordinary waterproof paint as the primary shower membrane.
- Perform the required flood or water test before covering the waterproofing.
- Protect the completed waterproofing from damage during later construction.
Frequently Asked Questions
What is the best waterproofing membrane for a wood subfloor?
There is no single membrane that is best for every wood-framed bathroom. For tiled showers, a complete sheet membrane or liquid-applied waterproofing system can both work when installed over a suitable substrate and according to the manufacturer’s requirements.
Can I waterproof plywood directly?
Some waterproofing products are designed for specific wood substrates, but the correct answer depends on the product and the complete flooring assembly. Do not assume that any liquid membrane can simply be painted directly onto plywood and covered with tile.
Is cement backer board waterproof?
Cement backer board is generally used as a tile substrate, but it should not automatically be treated as the waterproofing layer. A separate waterproofing system may be required depending on the shower assembly.
Is liquid waterproofing better than a sheet membrane?
Not automatically. Sheet membranes provide consistent manufactured thickness, while liquid membranes can be convenient around complex shapes. Installation quality, compatibility, detailing, and following the manufacturer’s system requirements are more important than choosing one format solely because it is sheet or liquid.
Do I need to waterproof the entire bathroom floor?
Not every bathroom requires the entire floor to be waterproofed in the same way as a shower. A standard shower, curbless shower, and wet room have different exposure levels and therefore different waterproofing requirements. Local building requirements and the flooring system should also be considered.
Conclusion
The best waterproofing system for a wood-framed bathroom floor is not simply the product with the strongest “waterproof” label. It is a complete assembly designed for the wood structure, substrate, finished flooring, and level of water exposure.
For a typical tiled shower, a properly installed sheet membrane or liquid-applied waterproofing system can provide reliable protection when the substrate, seams, corners, penetrations, and drain are all handled correctly.
For the main bathroom floor outside the shower, the waterproofing strategy can be less intensive, but the floor still needs appropriate substrate preparation, moisture protection, and properly detailed transitions.
If you remember only one thing from this guide, remember this: waterproofing does not fix a weak floor. Repair the wood structure first, choose a compatible system second, and then install the waterproofing as one continuous assembly.
If you are planning a bathroom renovation or dealing with moisture problems, see the Bathroom Waterproofing section for practical guides covering waterproofing materials, bathroom leaks, failed waterproofing layers, and repair methods.